DIY Home Improvement Projects

Current Home Improvement Part 6: Painting and Patching

Disclosure: This post may contain affiliate links, meaning I get a commission if you decide to make a purchase through my links, at no cost to you. As an Amazon affiliate, I earn from qualifying purchases. However, I only recommend products I would use myself and all opinions expressed here are my own.

Kinda looked and felt like this all week long. Image by Ryan McGuire from Pixabay

So, the past week or two has been a rough start. Between daylight savings that nobody alive today asked for, too many errands, and a bunch of unnecessary hurdles…it feels like trying to kickstart a motorcycle that’s out of gas whilst trying to herd feral cats.

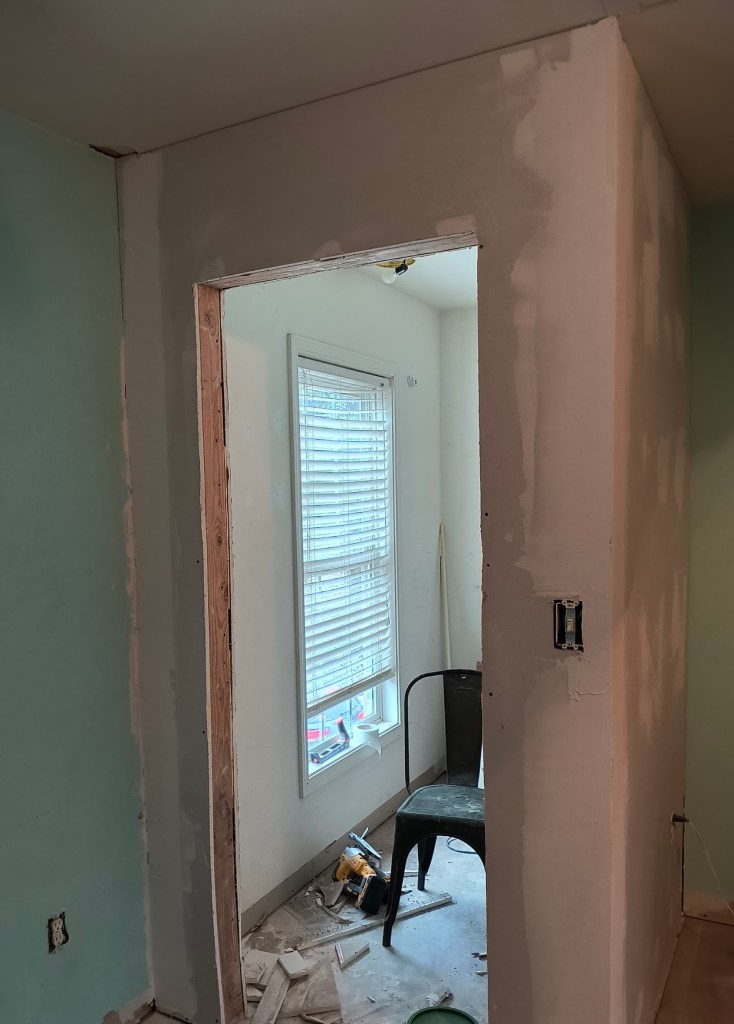
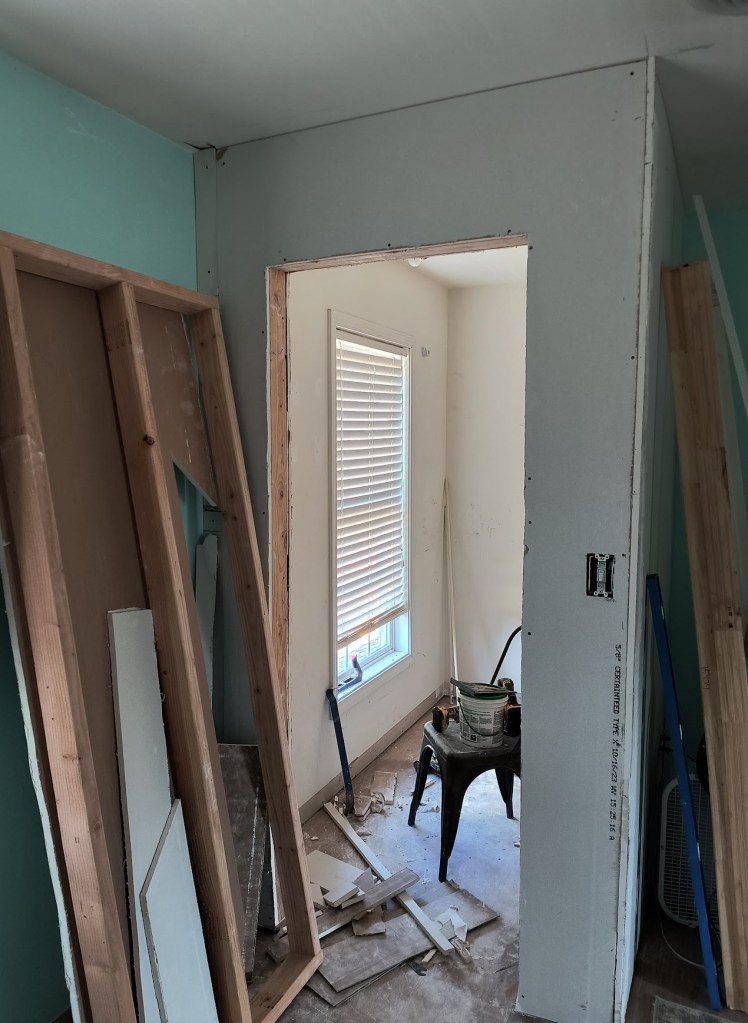
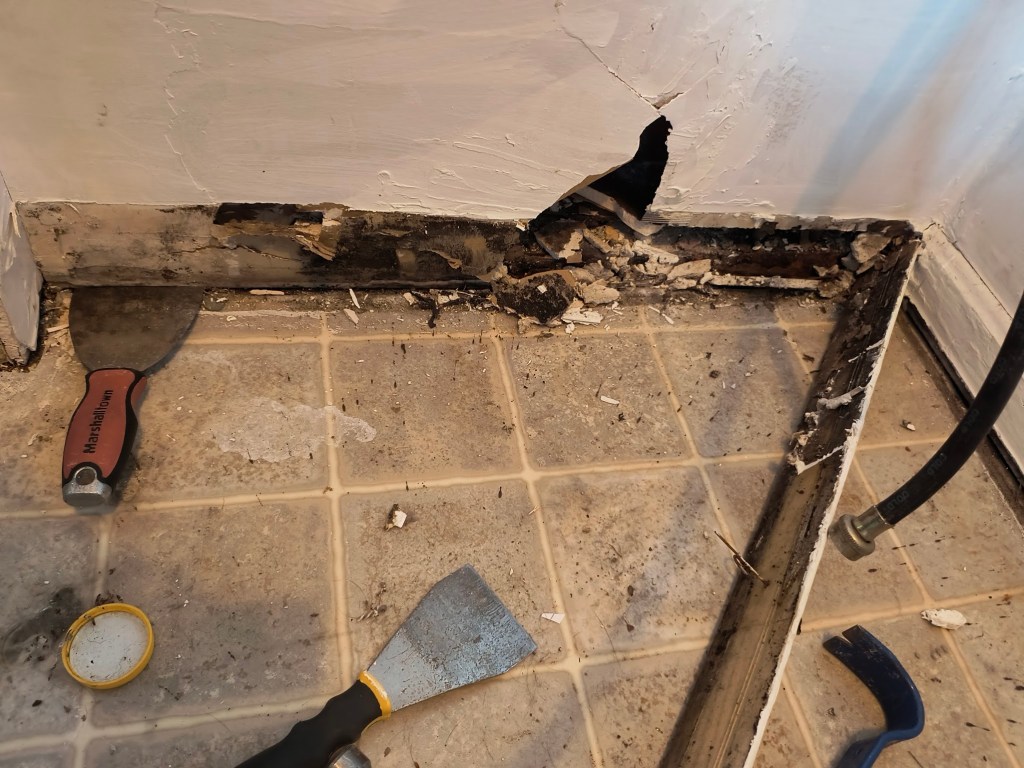
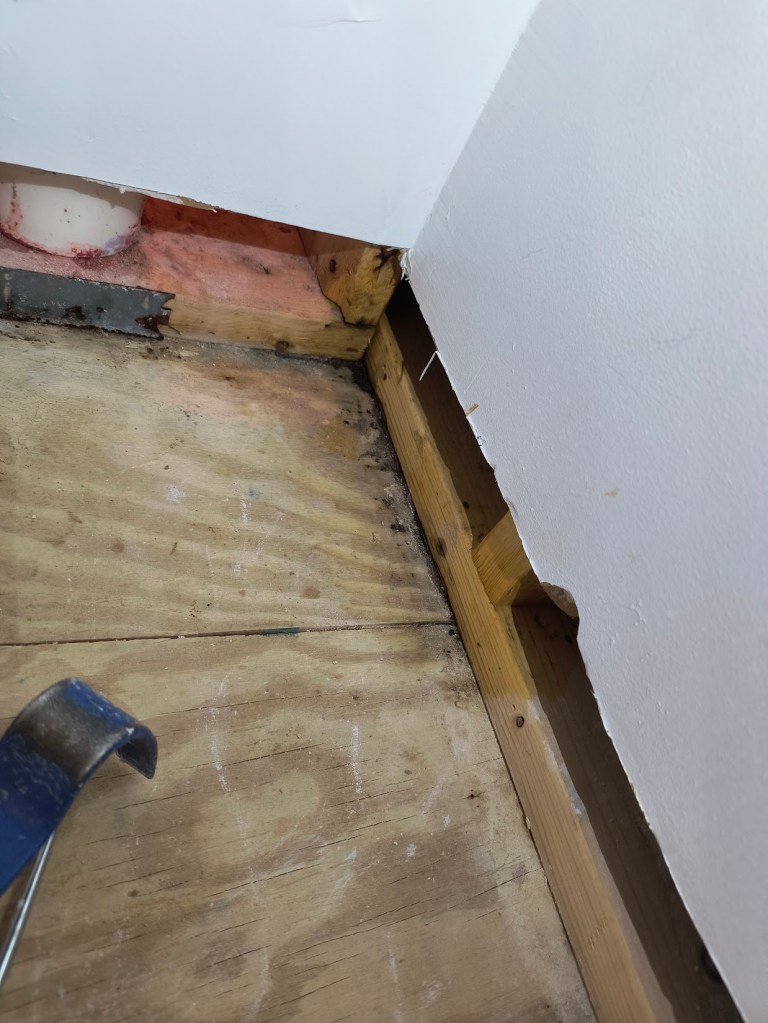
Today it’s really bumming me out. Why? Because I keep running into ish like this:

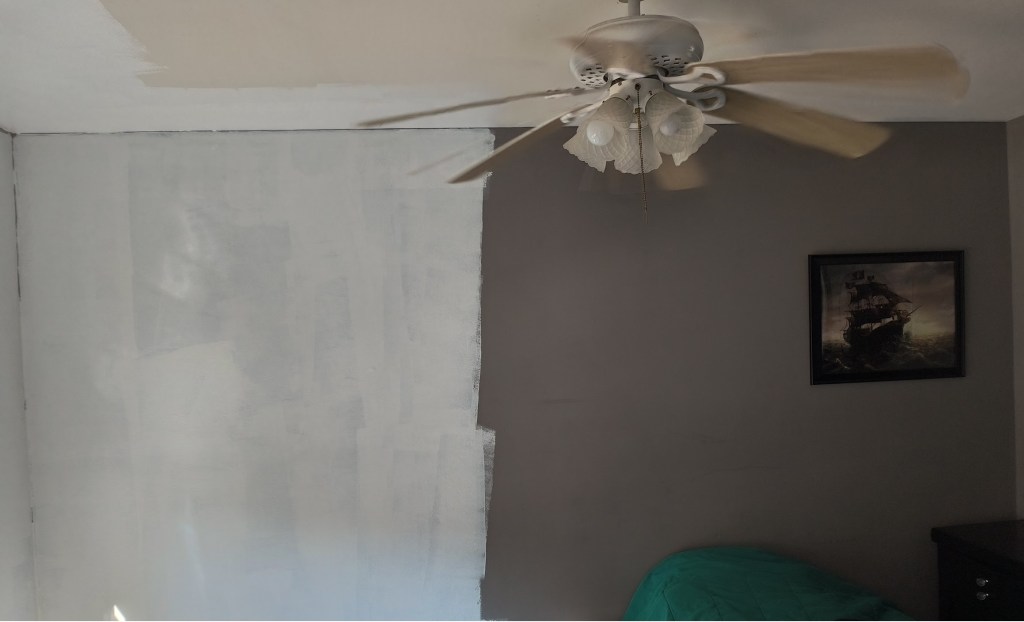
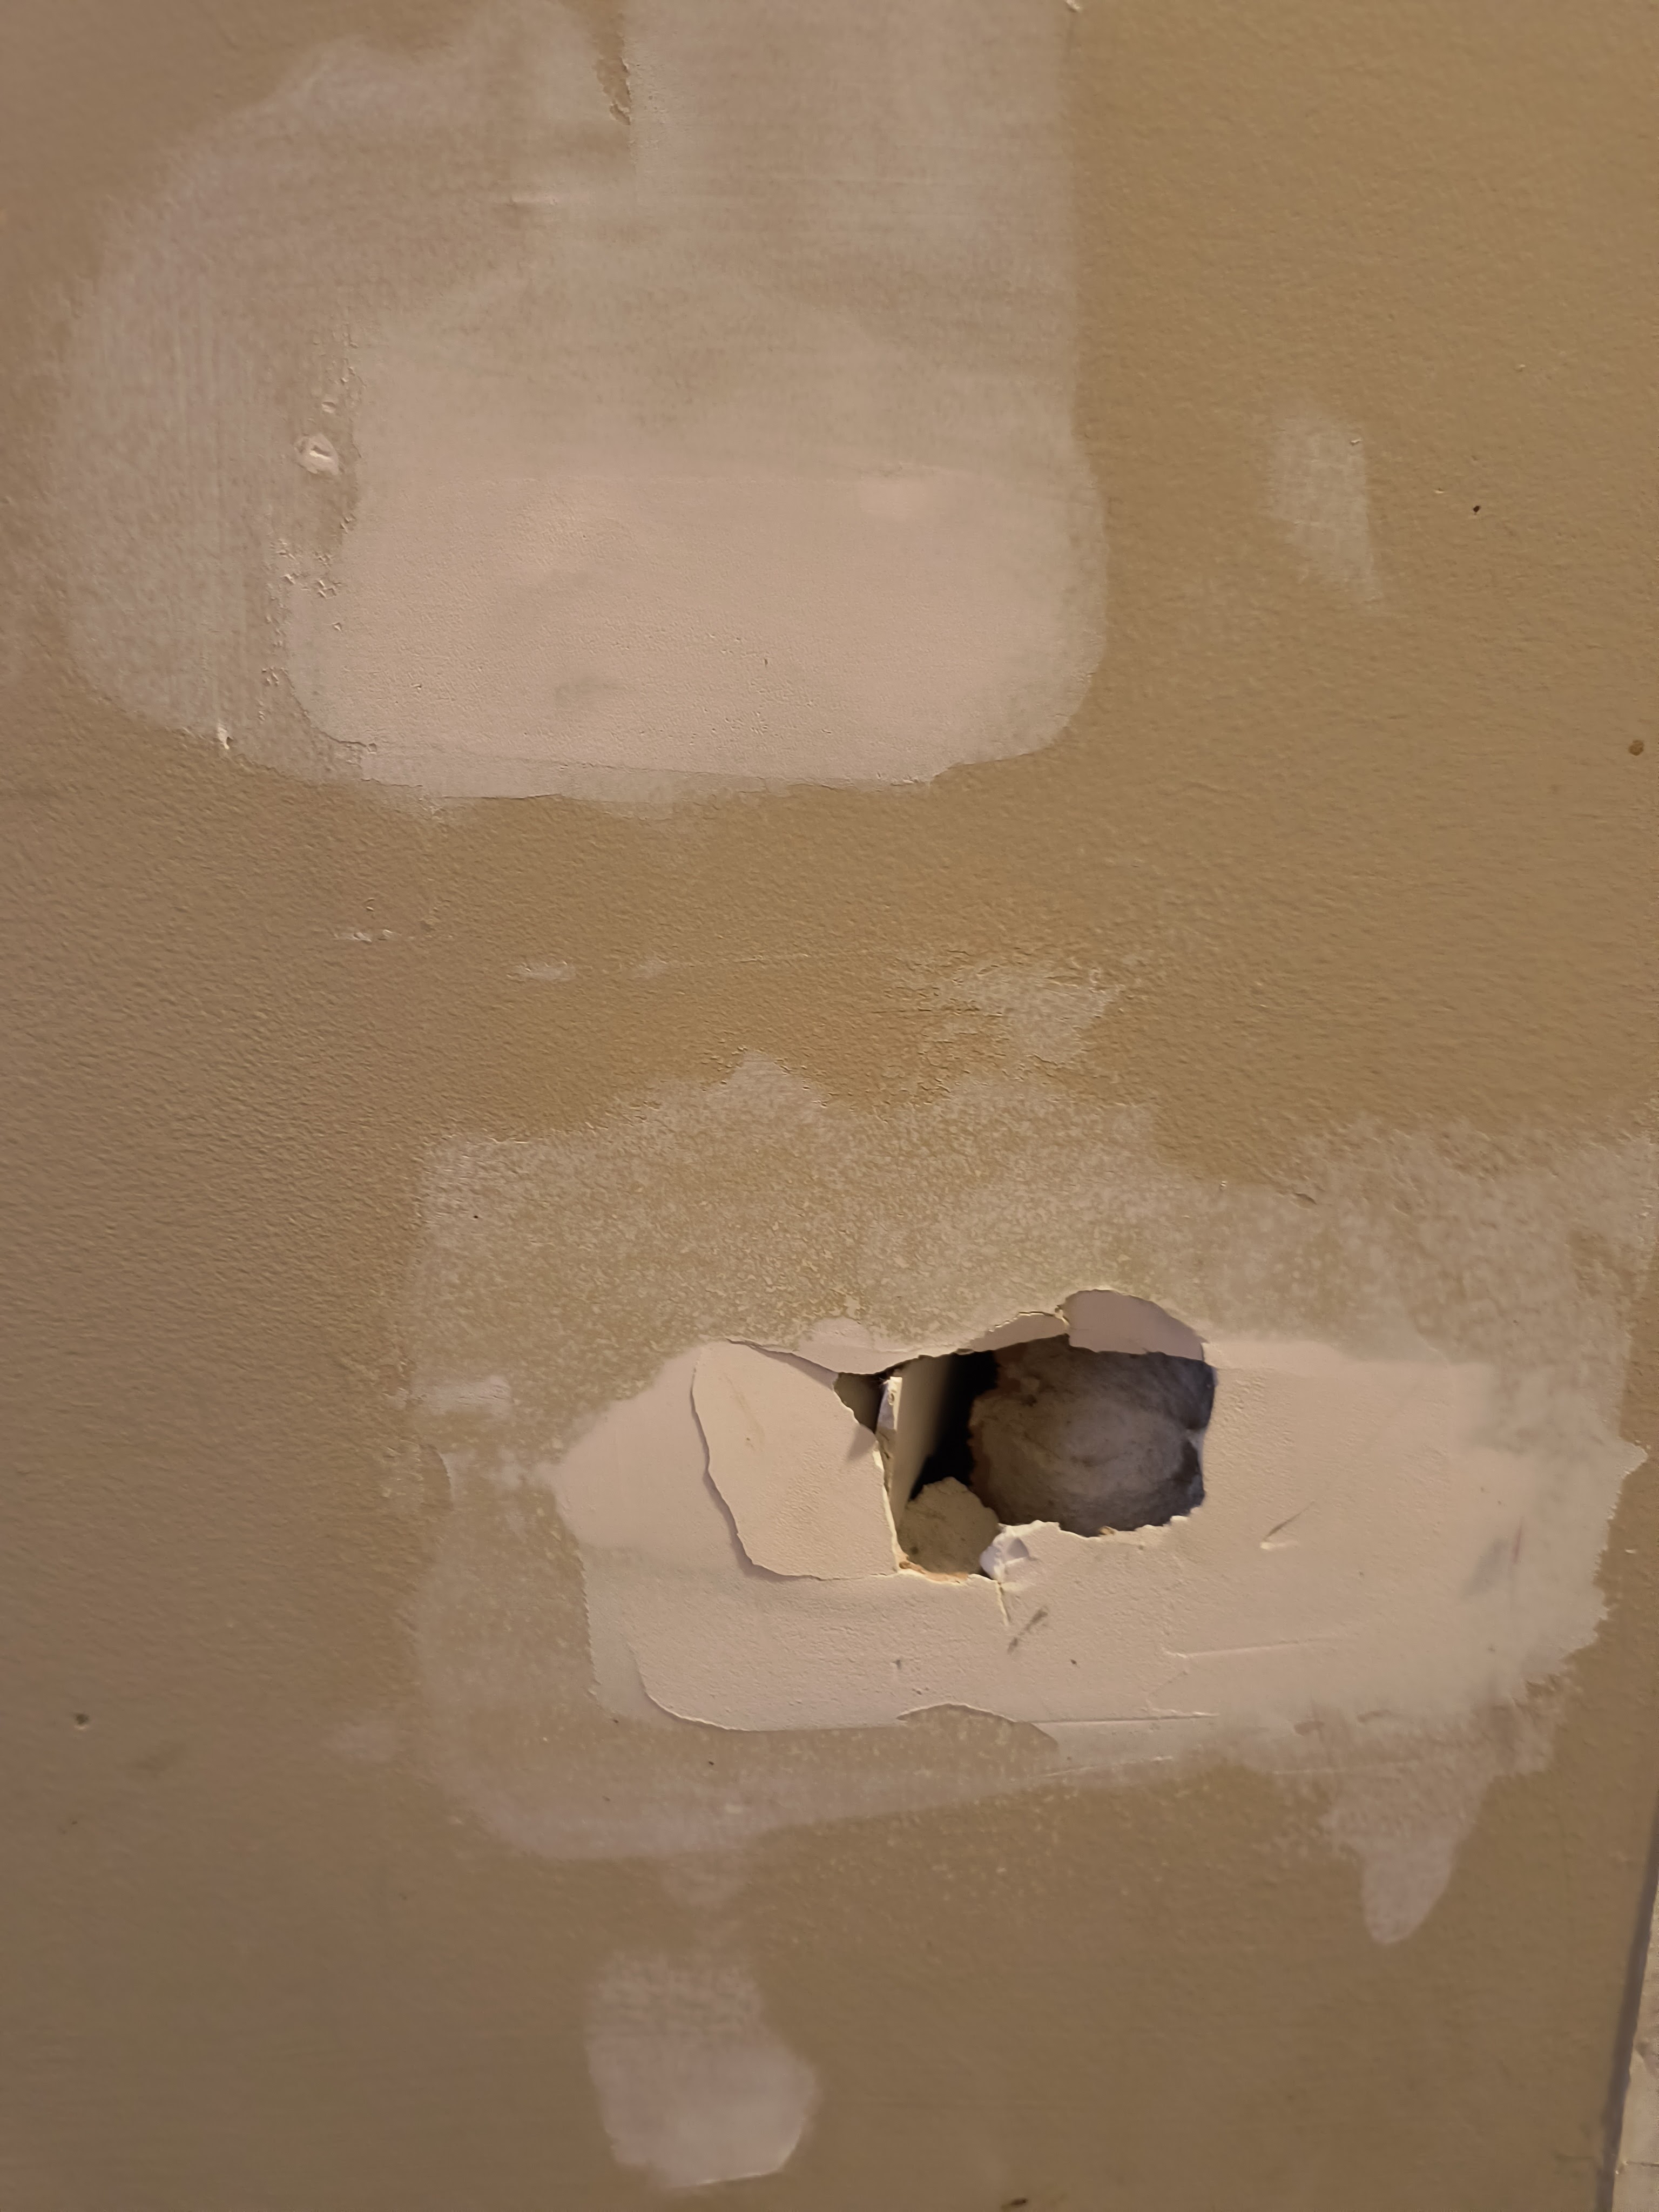
It seems like whenever we find our groove and we’re making real headway with a project, right when we’ve found our rhythm, there’s an obstacle. This time it came in the form of about 50 holes in the wall.

Half of which were ½” drywall anchor holes, and 5 of the holes were on the ceiling. One of the ceiling holes was 1 inch in diameter. Like what the….were you trying to hang a bike in here or something??

It took two rounds of spackle/sand/wipe before all of those were filled and blended. Never in my life did I ever think I would see the bottom of a 32oz pail of spackling. That’s the one I always use. It gets the job done well and it’s color changing: one less thing I have to remember. Anyhow, here I am. This is why we can’t have nice things, folks. Because people don’t take care of them.

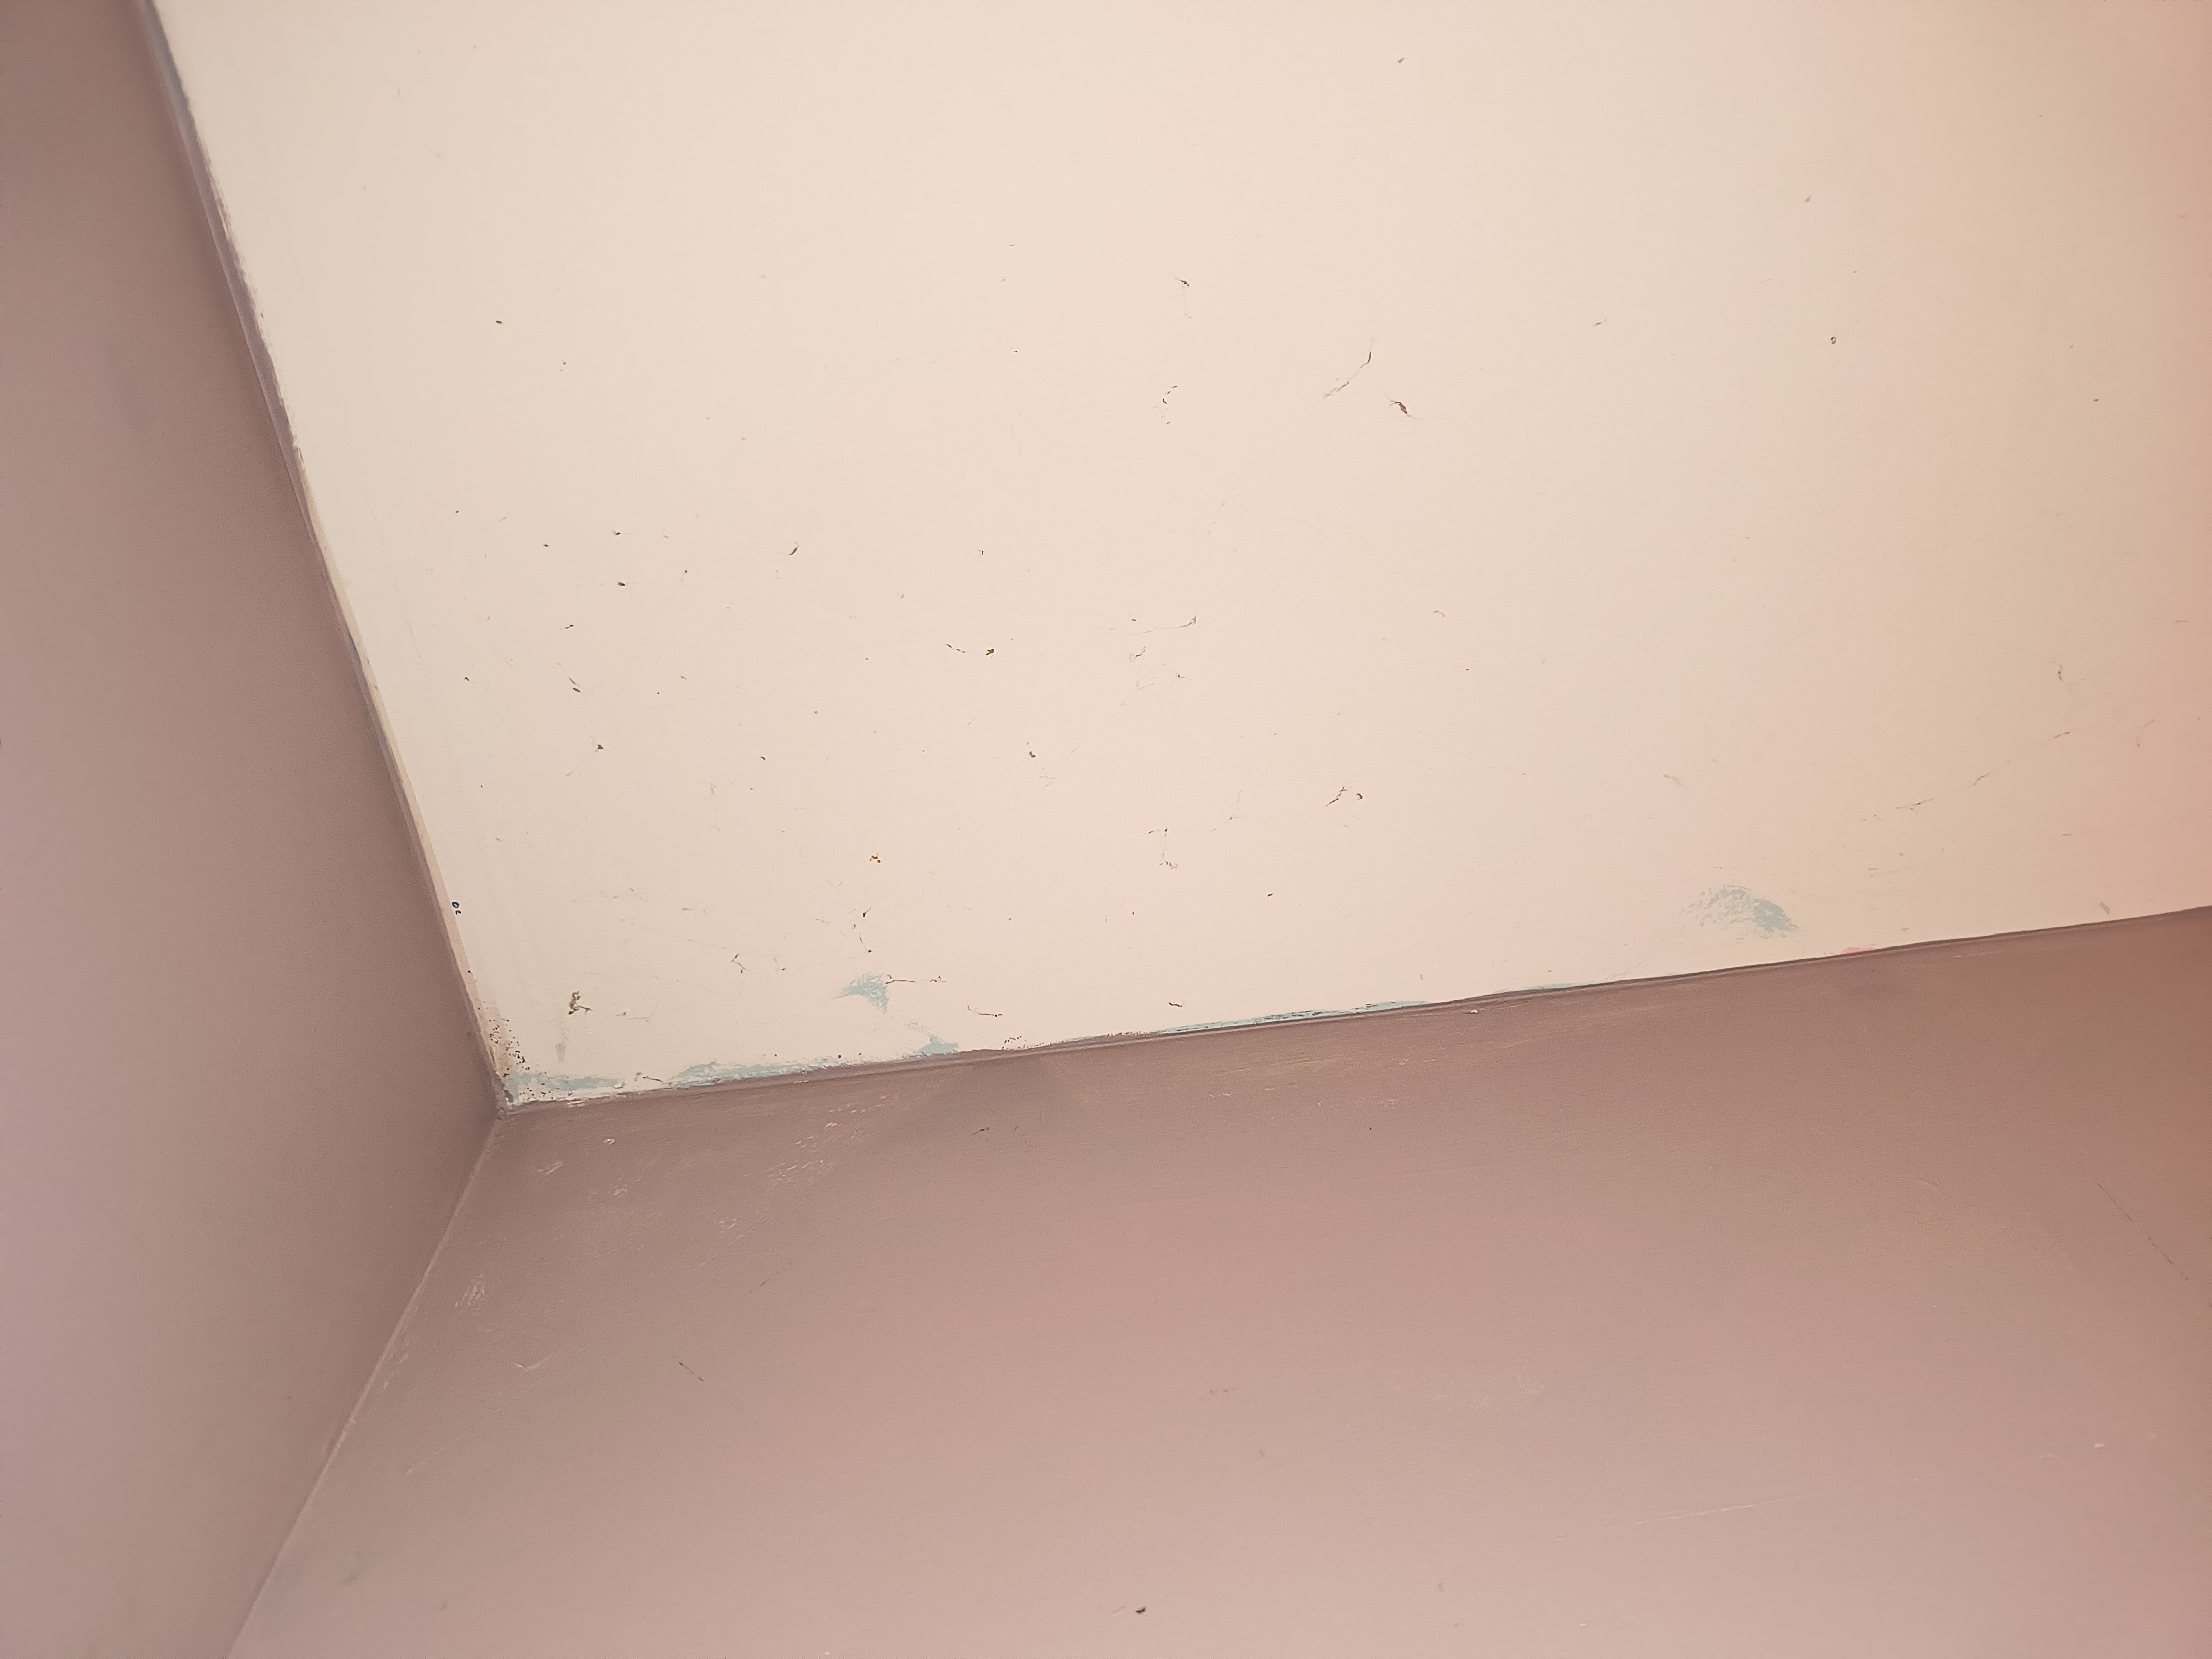
Then there’s all of the dark paint taps where the ceiling meets the wall. I have to go over and over that edge to cover them up before I can paint the whole ceiling. I have no idea why, but there’s a lot more of those in this bedroom than the last one.

TIP: Nobody’s perfect, but painter’s tape, precision, and taking breaks will go a long way in helping you avoid those dreaded paint taps on the ceiling. Just sayin’.

Then there’s whatever the Art School Reject is going on here:

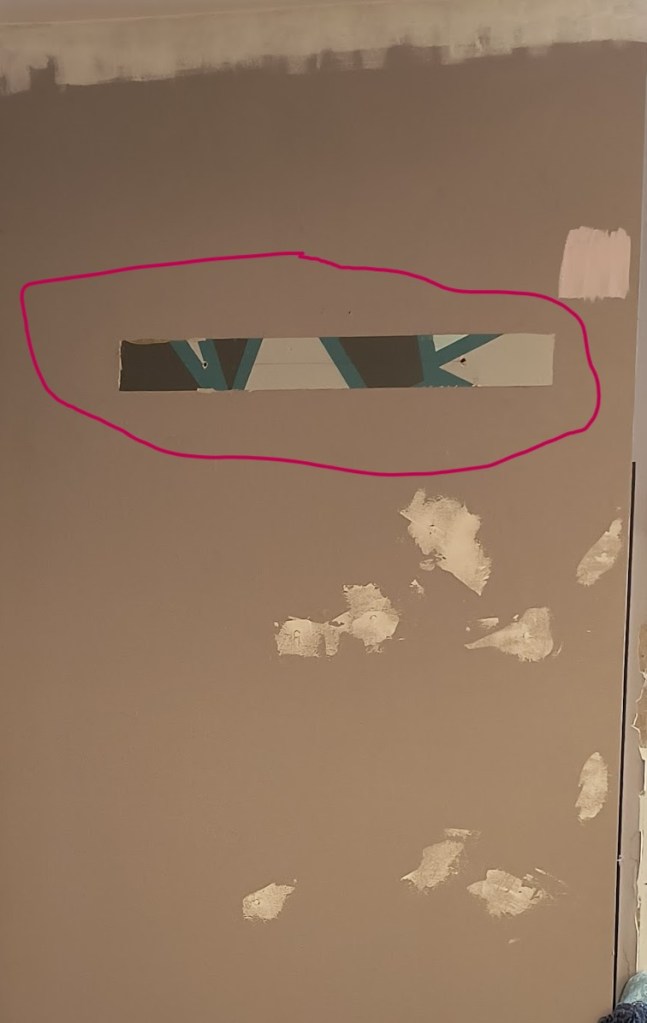
At least that’s not a big deal because I’m already covering up a bunch of dark paint. But it reminds me of Art that needs to be explained (because it’s terrible) and all they keep saying is “It’s abstract.”

Or a room in a 1950’s home, where according to Brewster Home Fashion it was commonplace to see 2-3 different wallpaper prints in the same room. This house is from the early 2000’s, and I’ve seen smudges of at least 4 different paint colors in this one room to include a peach/salmon color, a dark teal, purple, brown, etc. Same-same, but different…apparently the apple really doesn’t fall far form the tree.

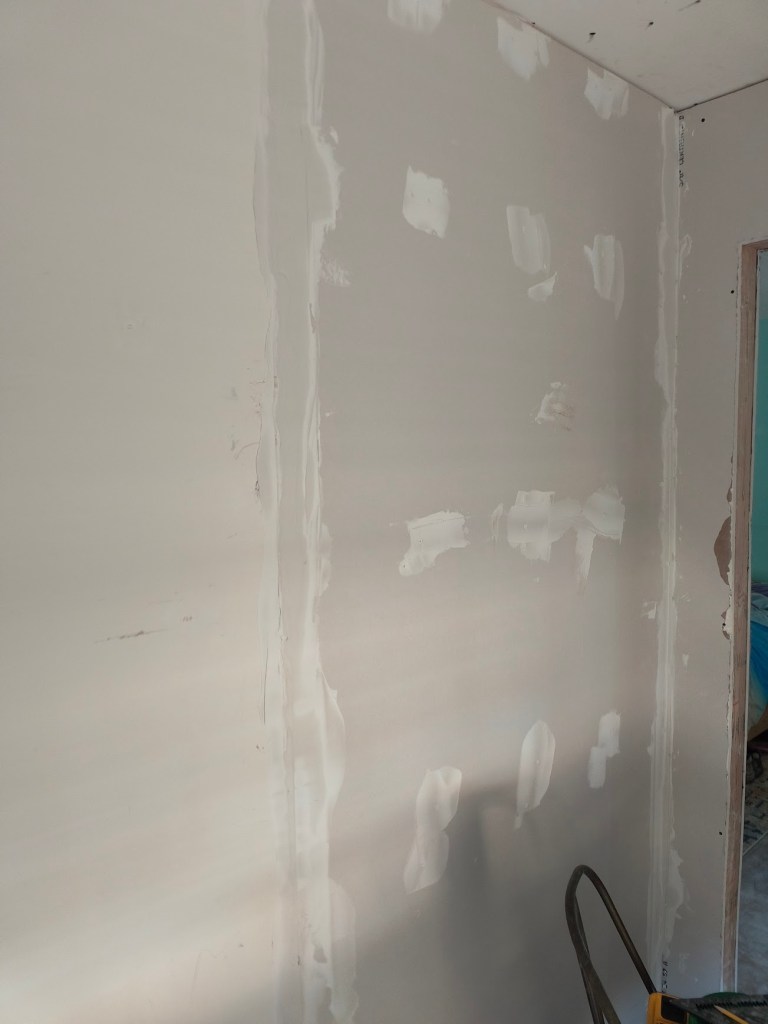
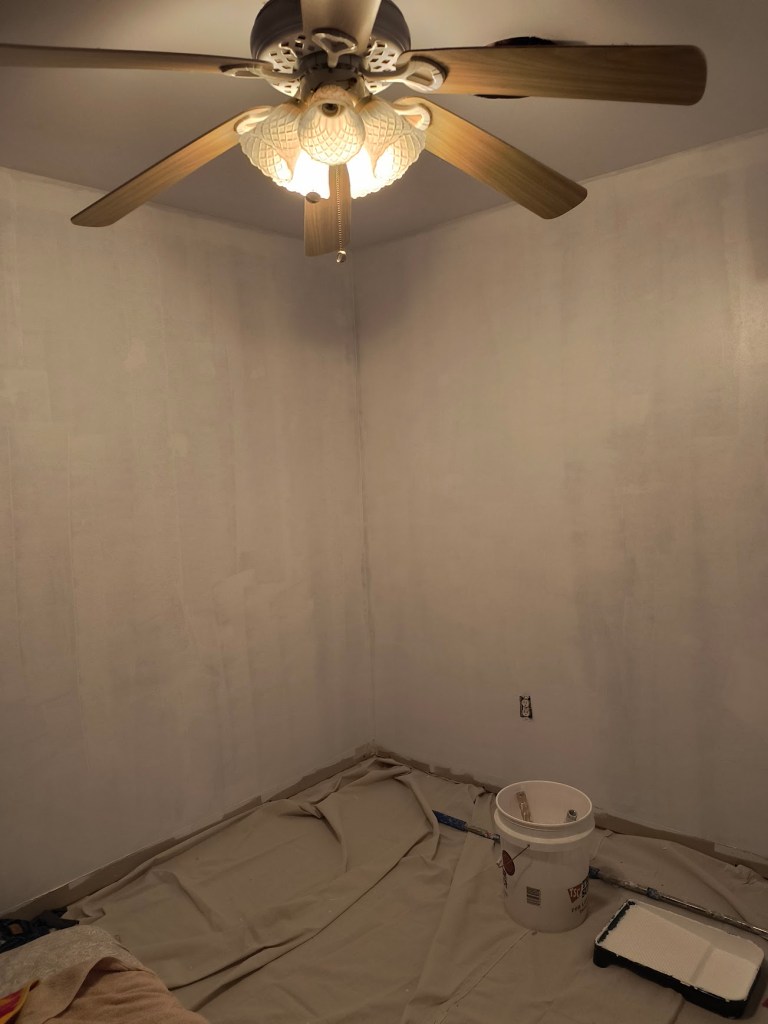
Despite it all, I am making progress. This picture represents the first coat of white is on bedroom #2’s walls. I’m ecstatic that I don’t have to look at the leopard pattern of spackle splotches anymore.

Setback #2

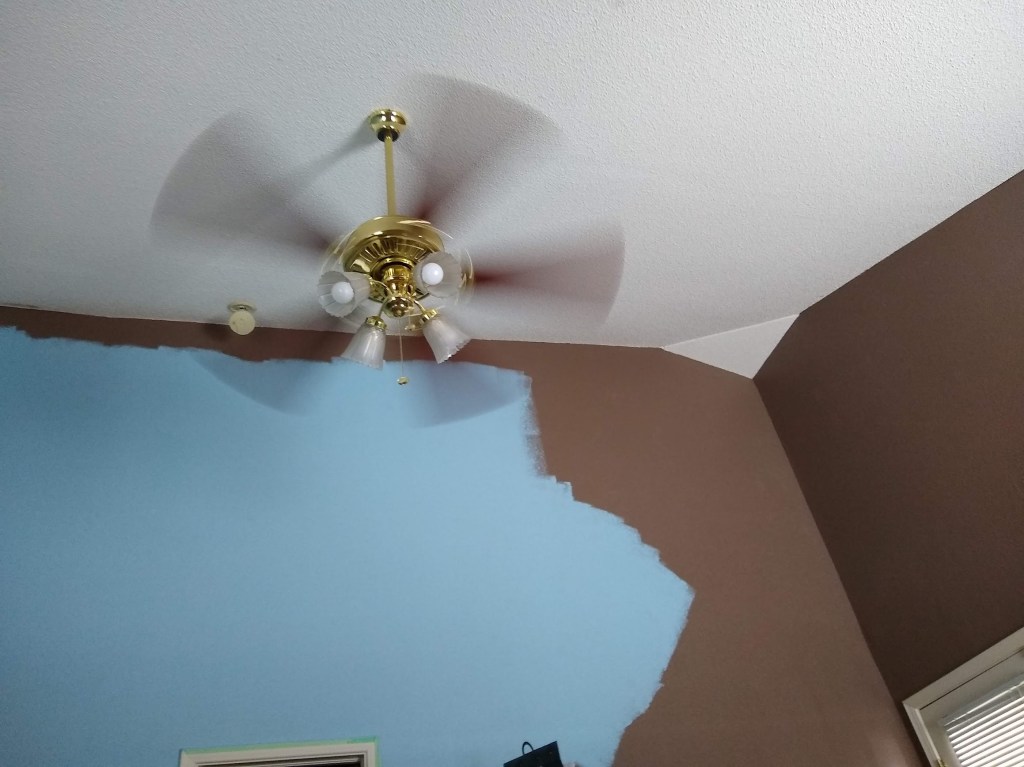
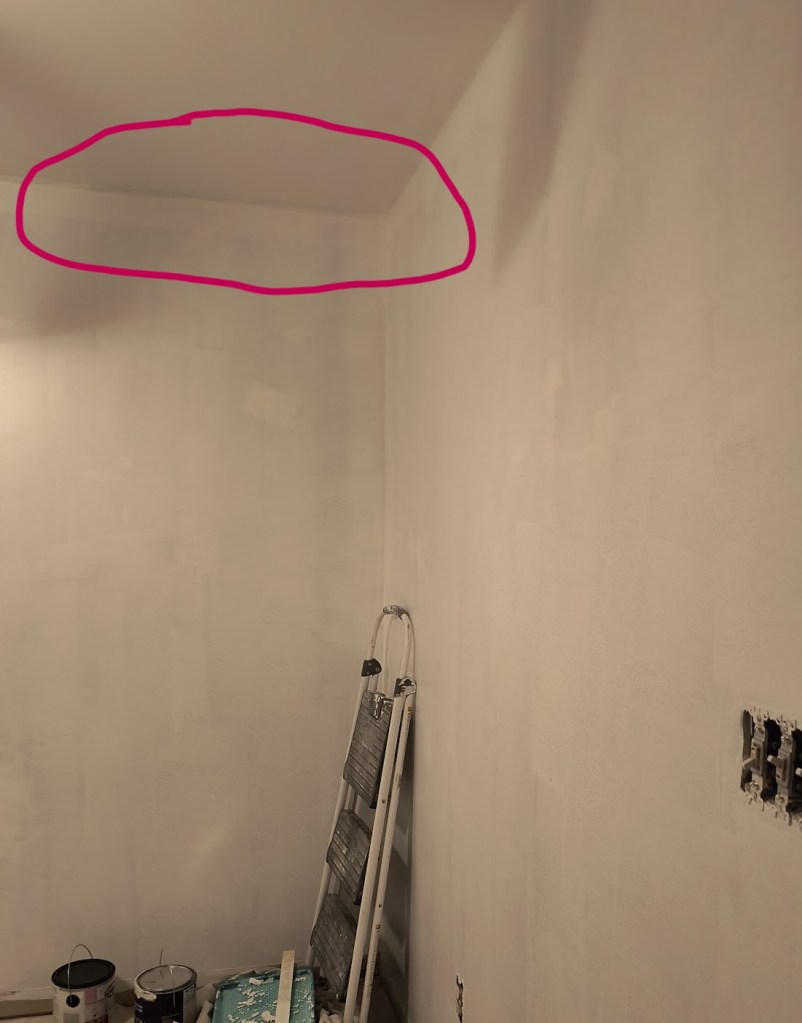
Whilst working on refreshing the ceiling, I ran into another unexpected setback. I was touching up the ceiling edge with what I thought was the same ceiling paint as before. It was, except for the brand name. Apparently, that made a huge difference, and I don’t mean in terms of coverage.

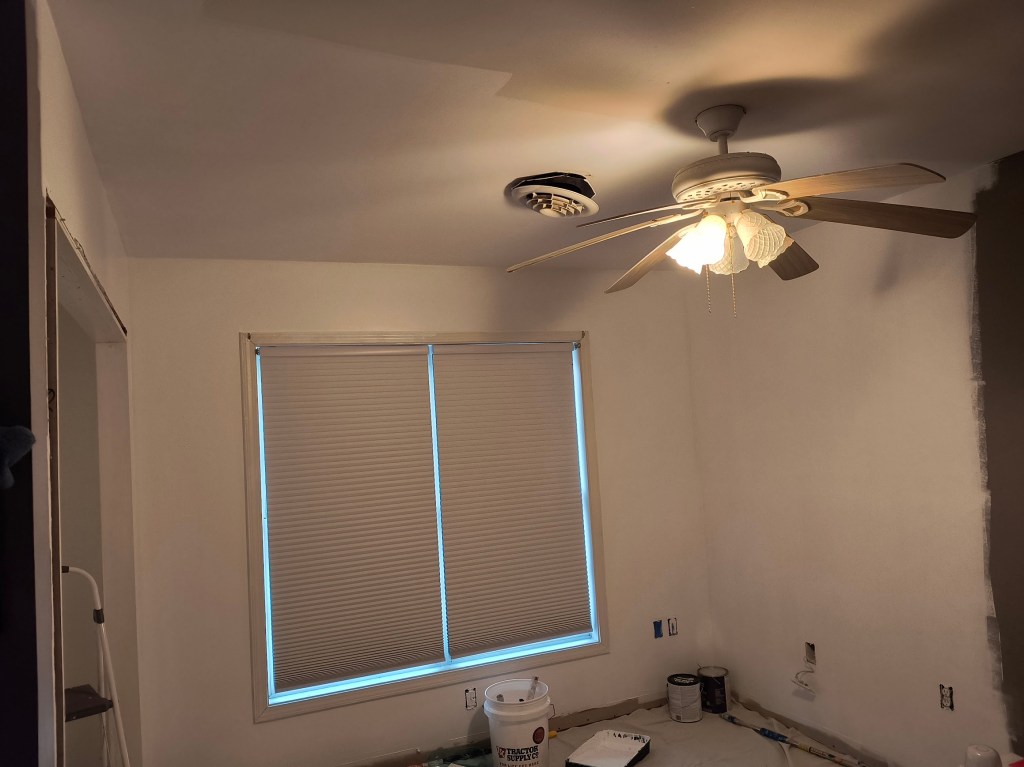
In the below photo, you see the nice bright white of the first coat of ceiling paint, from the Zinsser brand. Beautiful. But if you look closer, you can see the “smoking room white” ceiling color on the edges, courtesy of the Glidden brand. I do NOT recommend.


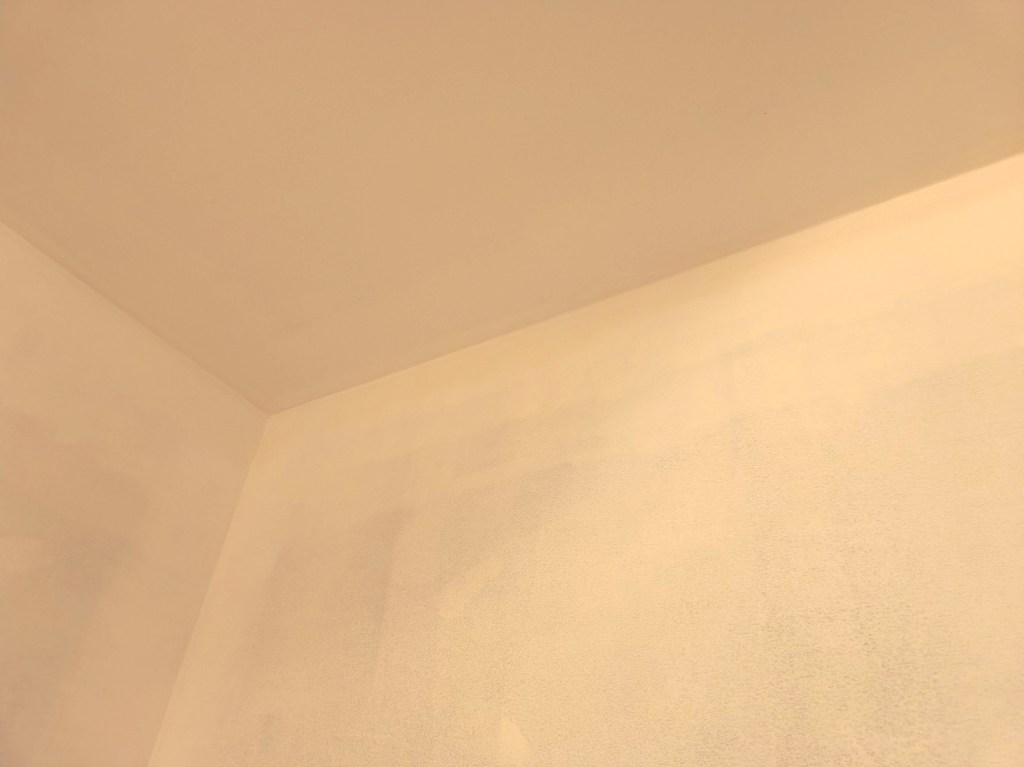
Maybe I just had a dud, one that was stored incorrectly, mixed a little wrong, or had been sitting just a little too long. And of course there’s no expiration date on the paint can, nor could I find a manufacturing date to even guess at its age.

In terms of appearance, everything looked fine once I gave it a good stir. Stirring the paint before using is good practice to do every time, but it becomes necessary when the can of paint has been sitting for a while.

There was no foul or rancid smell, no weird growth or chunks, and no discoloration…until it dried. Mother fu….now I have to go back over the faint, yet noticeable weird yellow tinge. This right here is exactly why I am rightfully suspicious when things go according to plan, without a hitch.

Ah, well. You win some, you lose some, right? All I know is I am never buying that brand again. I’ve bought 3 cans of the Zinsser brand ceiling paint so far, and no problems whatsoever. Beautiful coverage, excellent results, every time.

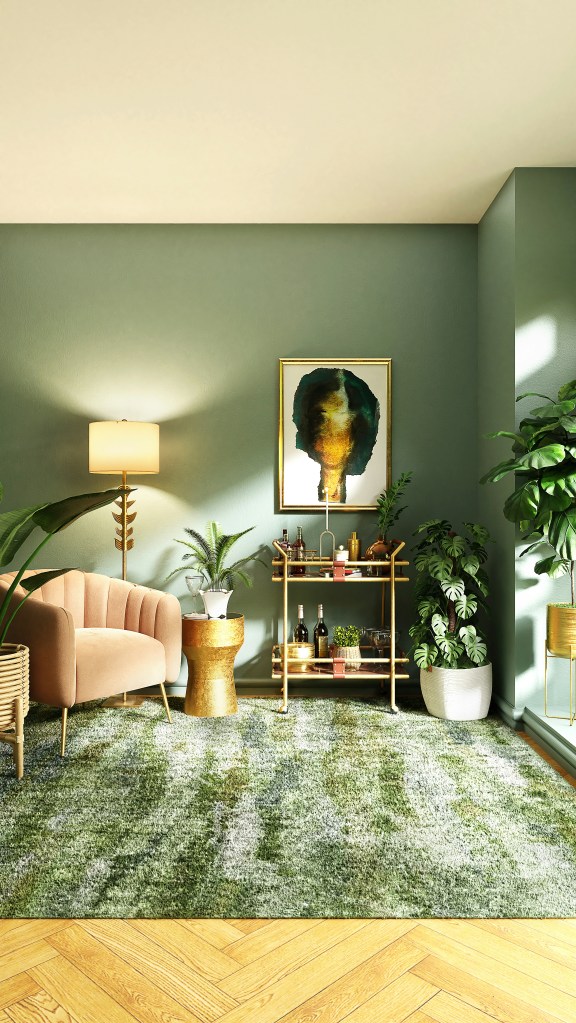
Meanwhile, we’re getting closer to finishing the development of our paint palette for the house. Deciding on simplicity, we’re going with one neutral color for the majority of the house, and different colors in the bedrooms.

Depending on what our neutral color selection looks like in the dining room, we may opt for a different hue in that room as well, or merely to break things up a bit. I will certainly not be springing for any “abstract” wall paint ideas.

That’s why people purchase artwork to hang on the walls. They can easily take it down when they decide a piece no longer suits their taste, or when they realize that it was a terrible, impulsive choice in the first place. It’s ok, we’ve all been there, I’m sure. 😉

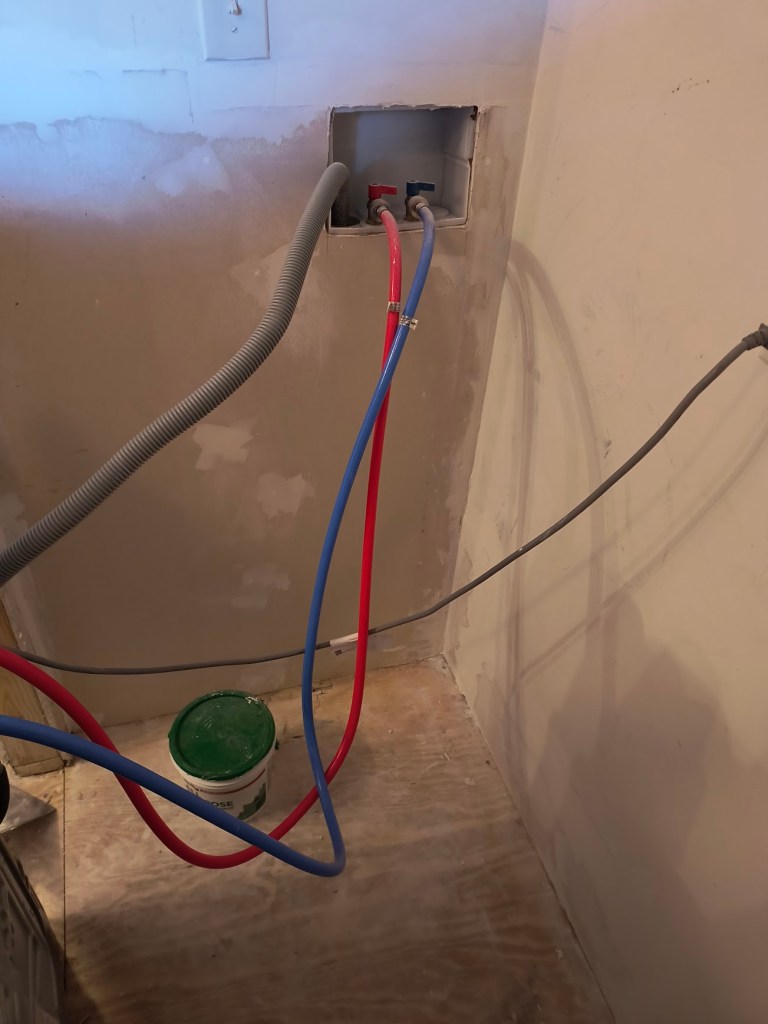
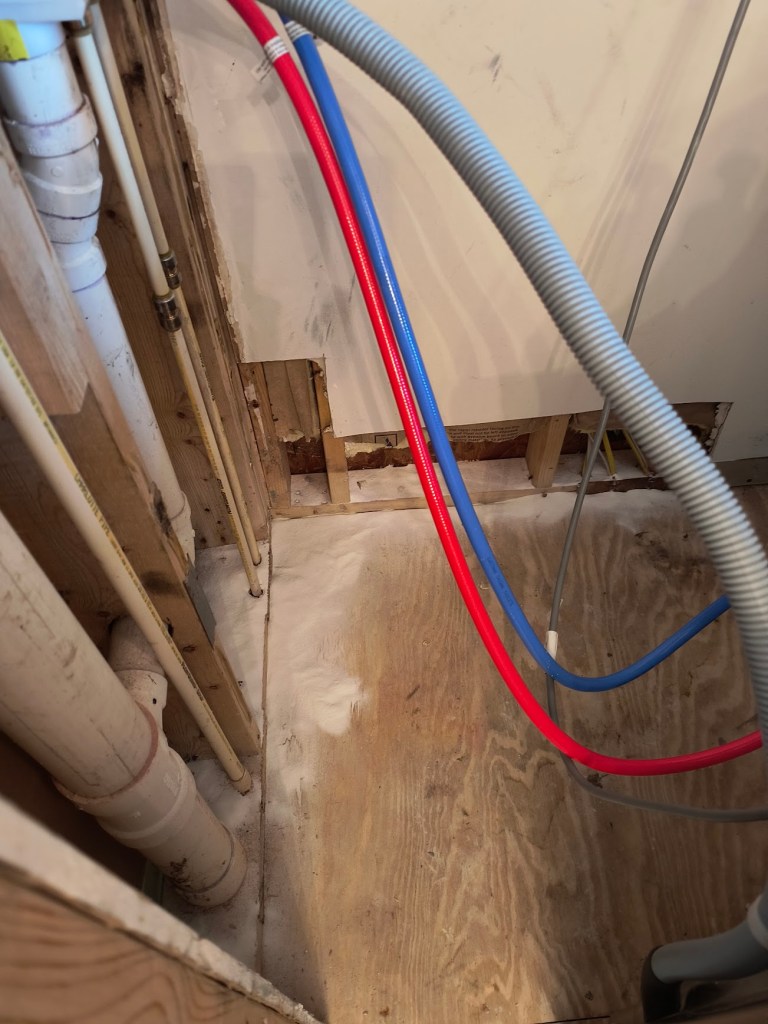
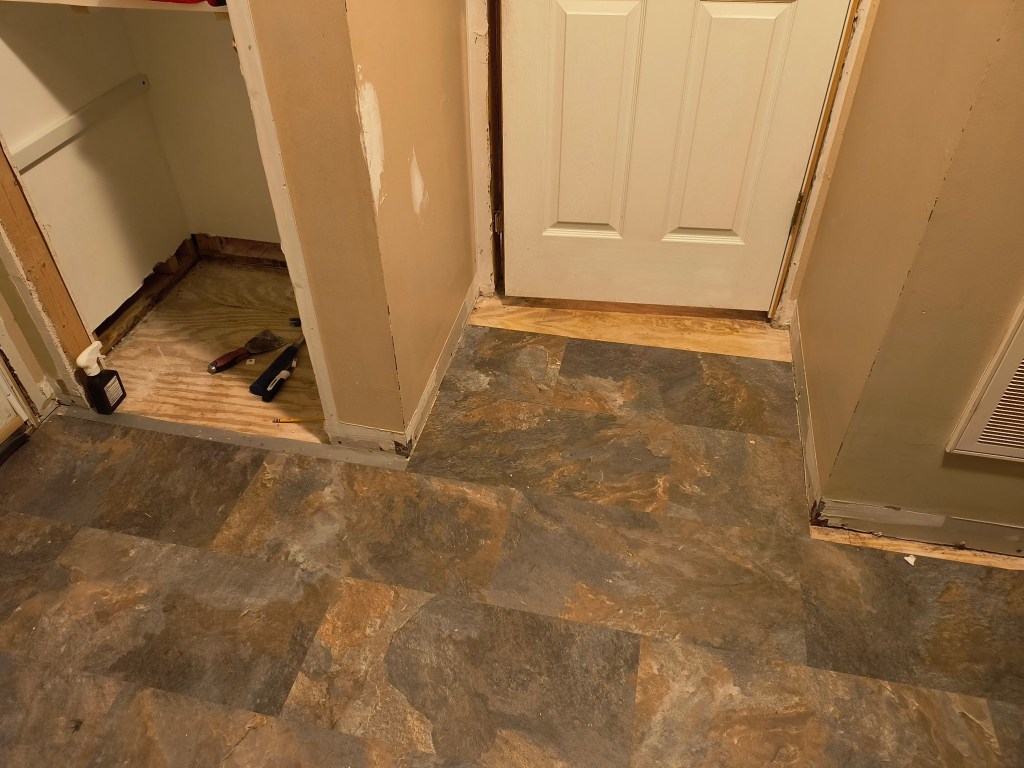
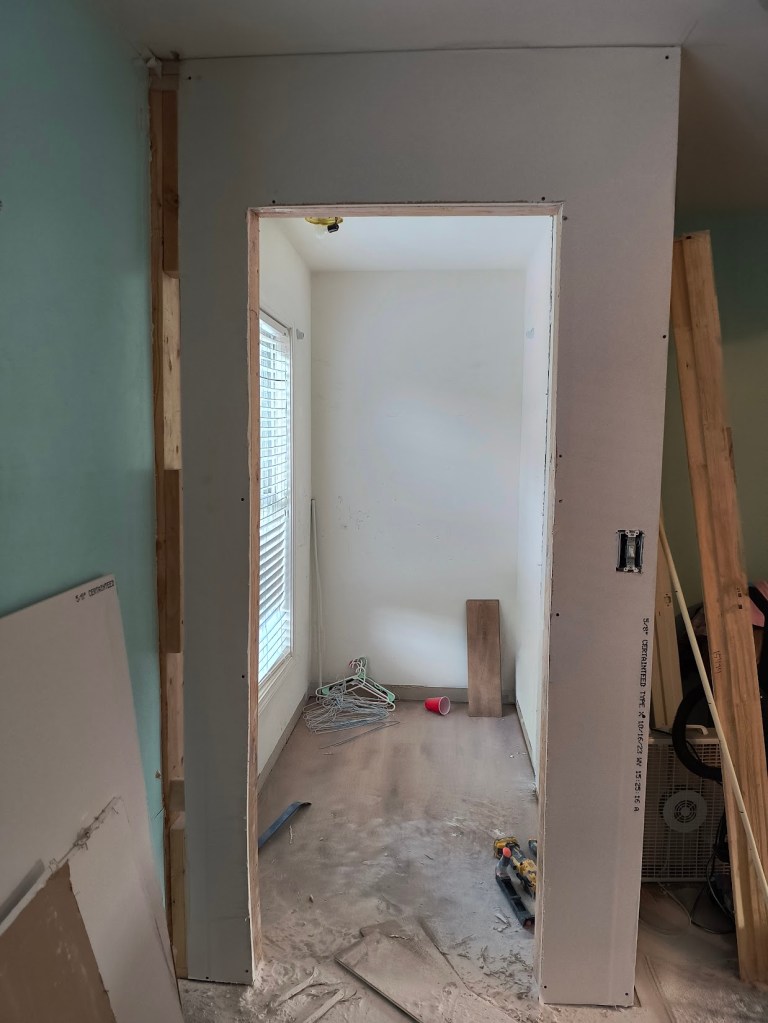
The laundry and pantry walls are also mended, now we’re doing the mud/sand/wipe/mud dance with the seams now. After that is finished and set, we’ll be priming with this mold and mildew resistant primer, following with a moisture-resistant satin or semi-gloss paint, and sealing with this kitchen and bath sealer and protectant.

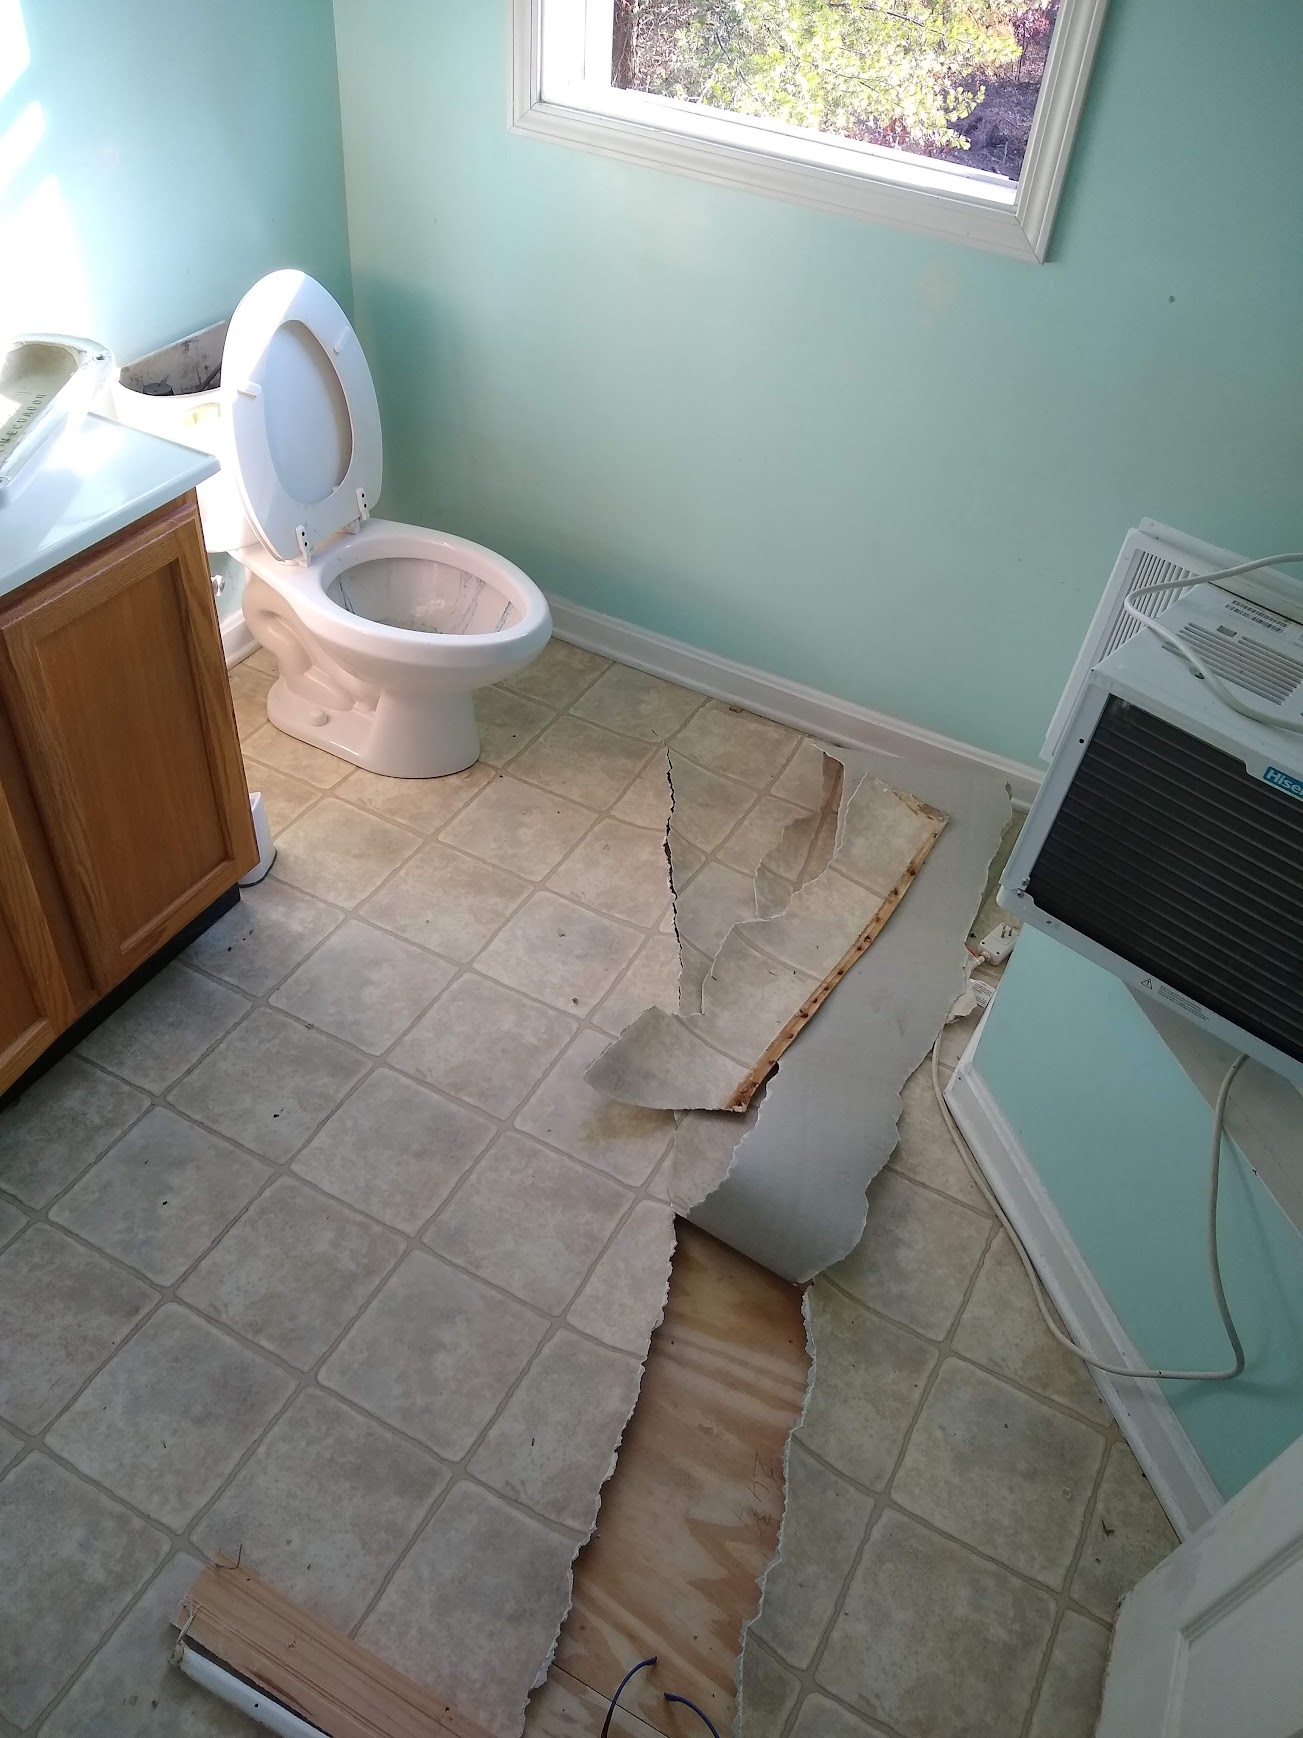
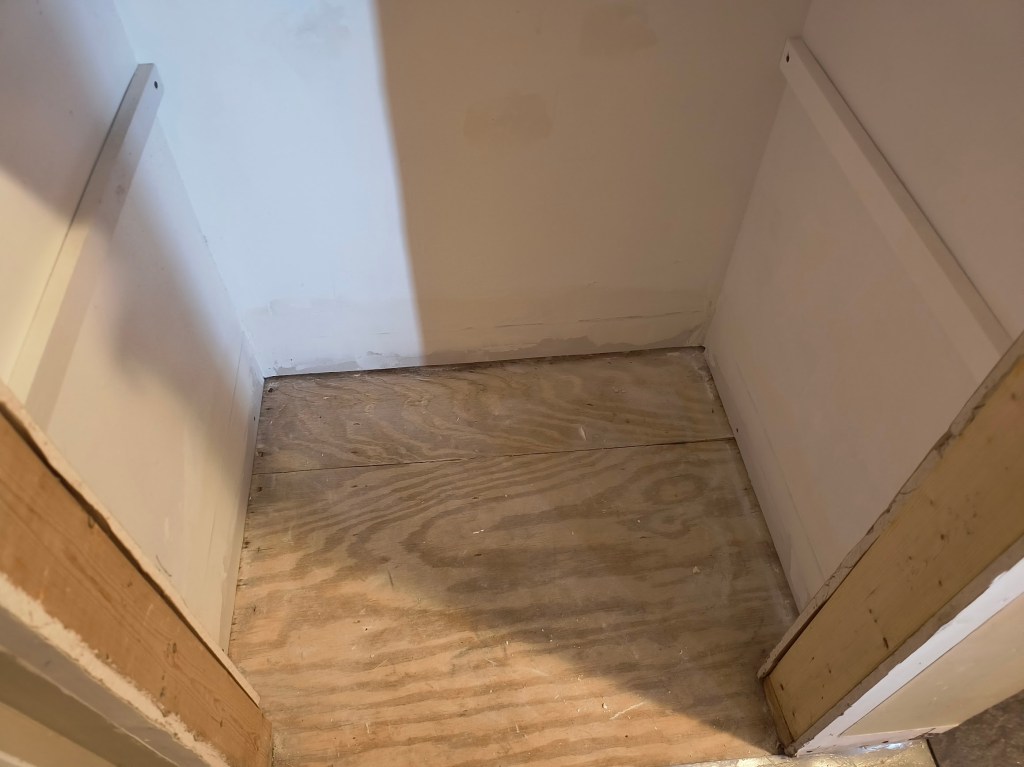
Once we finish the walls, I can finally finish installing the lovely LVP tile that we selected. After installing the baseboards, we can move the washer back to its rightful place. This means there’s only one more room to install flooring in: the master bathroom.  

Image by Ryan McGuire from Pixabay Meme by JenH@musecalmind

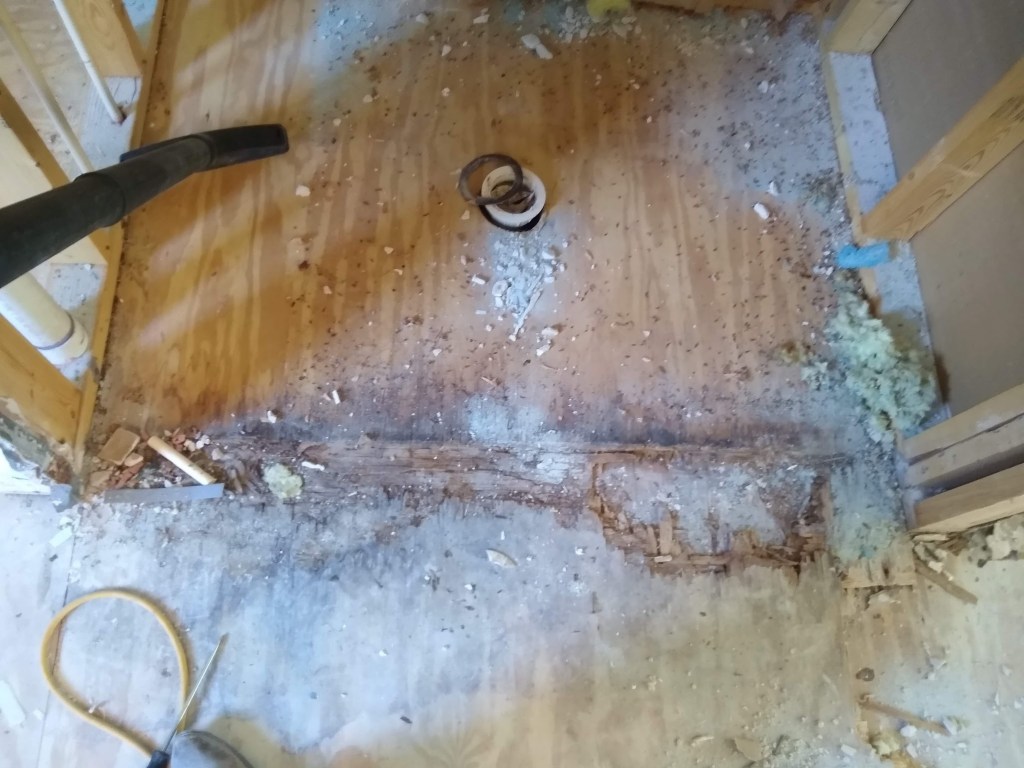
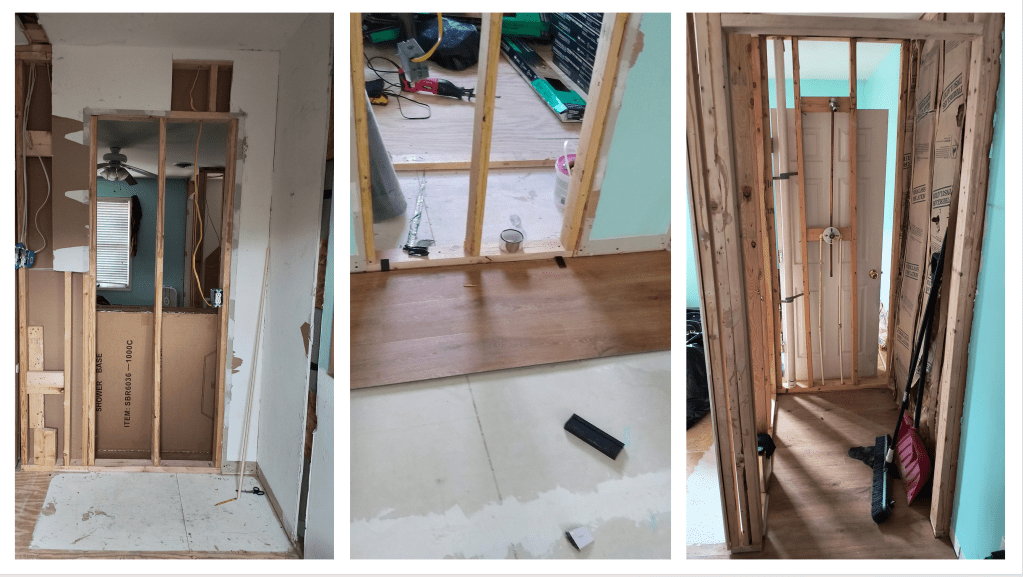
Unfortunately, we haven’t been able to touch the master bath remodel for quite a while. Between cycling through the different icks of cold and flu season and other projects taking priority, it’s been a couple of months since we’ve touched it.

Not to mention, we can’t seem to settle on what kind of shower/tub setup we would like to see in there. Standalone tub with overhead shower setup? Another all-in-one fiberglass shower/tub combo? Or shower panels with a separately purchased tub?

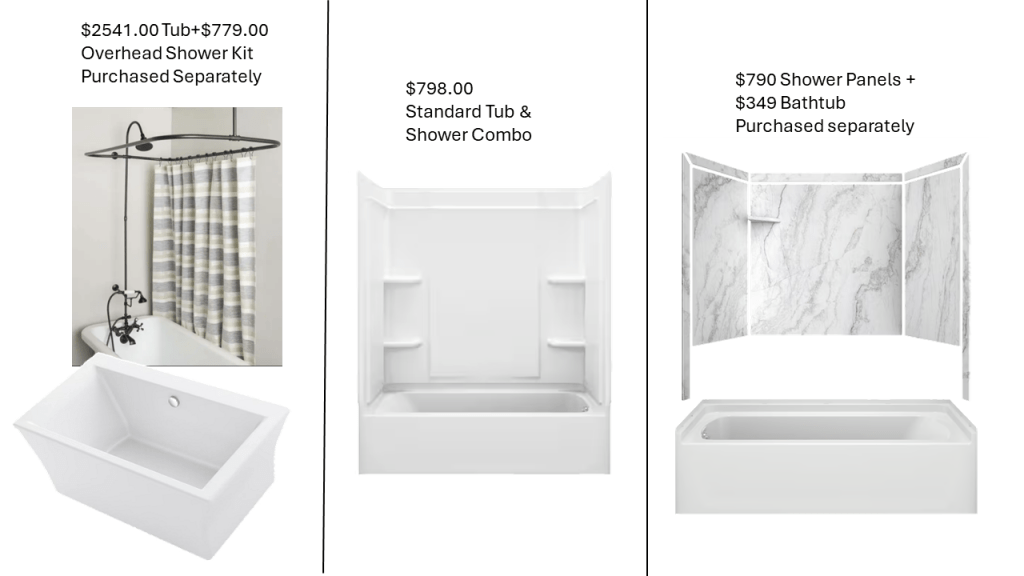
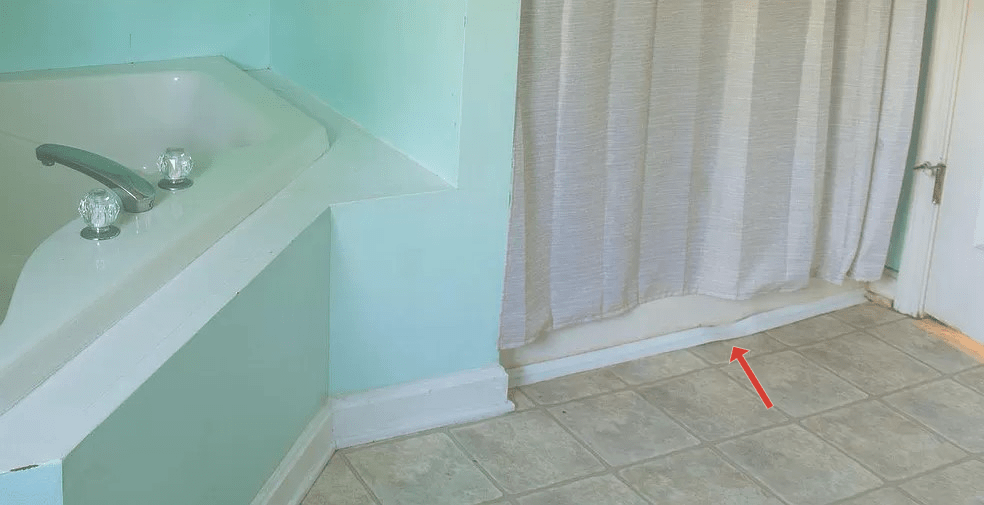
I know that the common all-in-one tub/shower combo is the most cost-effective, however I think the master bath should have something more elegant and attractive yet sensible. The first option speaks to my old soul and love of vintage and antique-esque things, but that price tag gives me pause.

Note: Bear in mind that none of these options displayed are at the high end. They’re about mid range in quality and price.

Whichever option we end up going with, I’m definitely getting a dual handle shower, and then upgrading to dual shower heads. The dual handles are mostly a preference, but it also imparts a vintage feel. I prefer having two shower heads with one being detachable, as this comes in handy for washing my large dog when it’s too cold to do it outside.
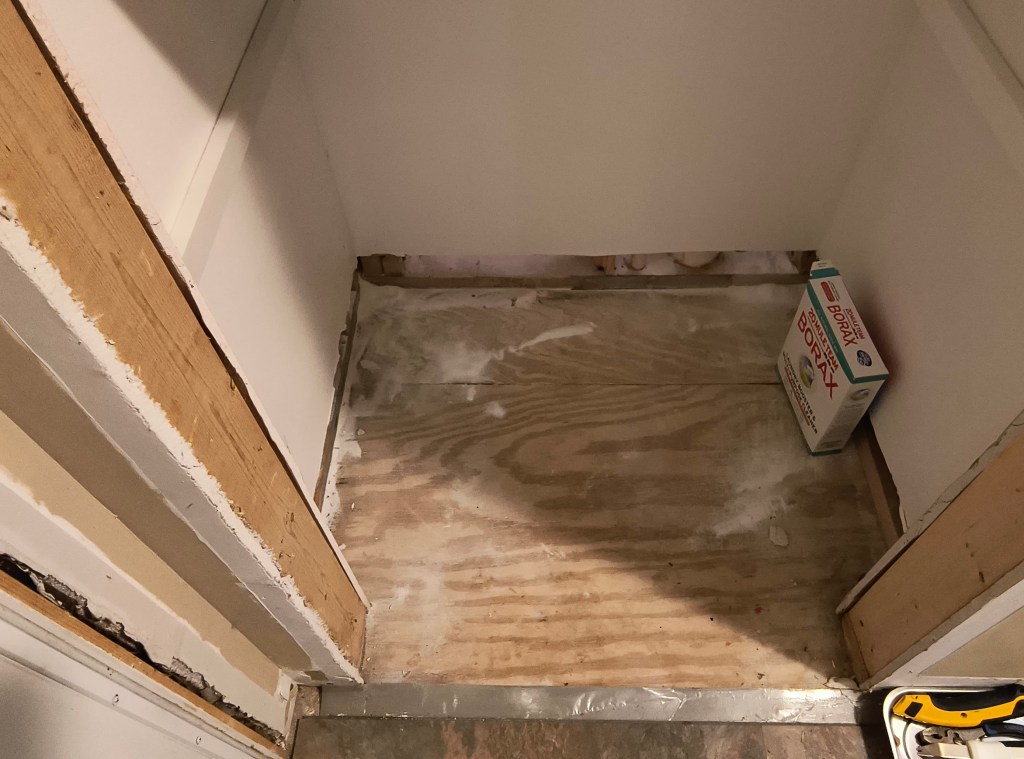
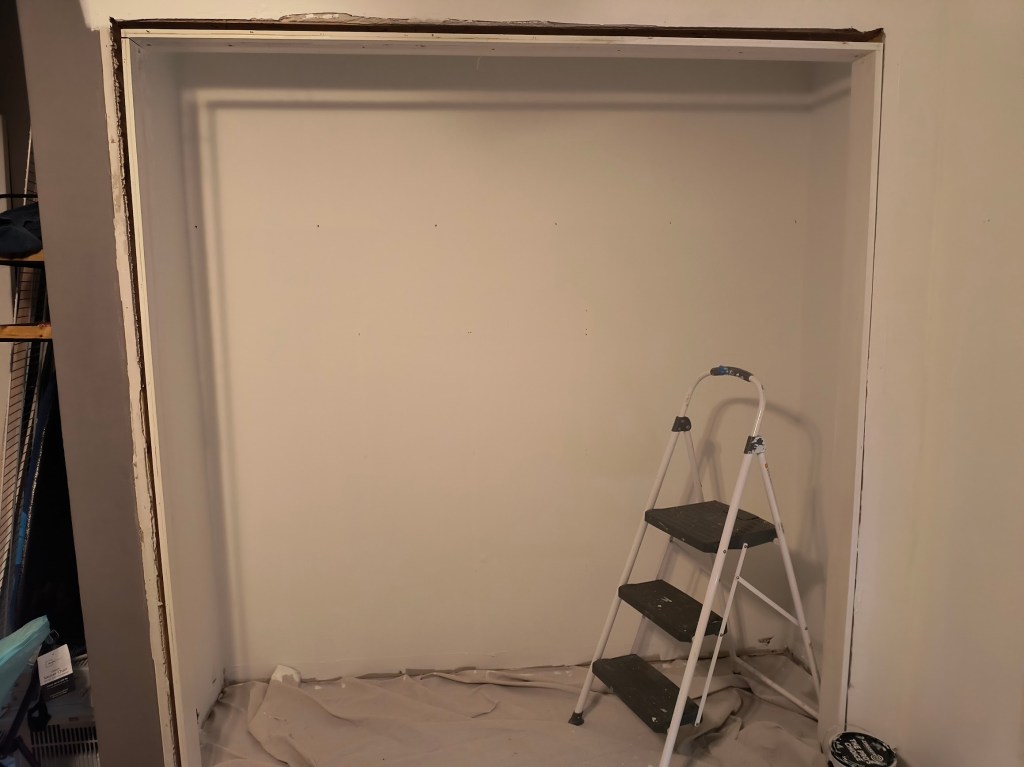
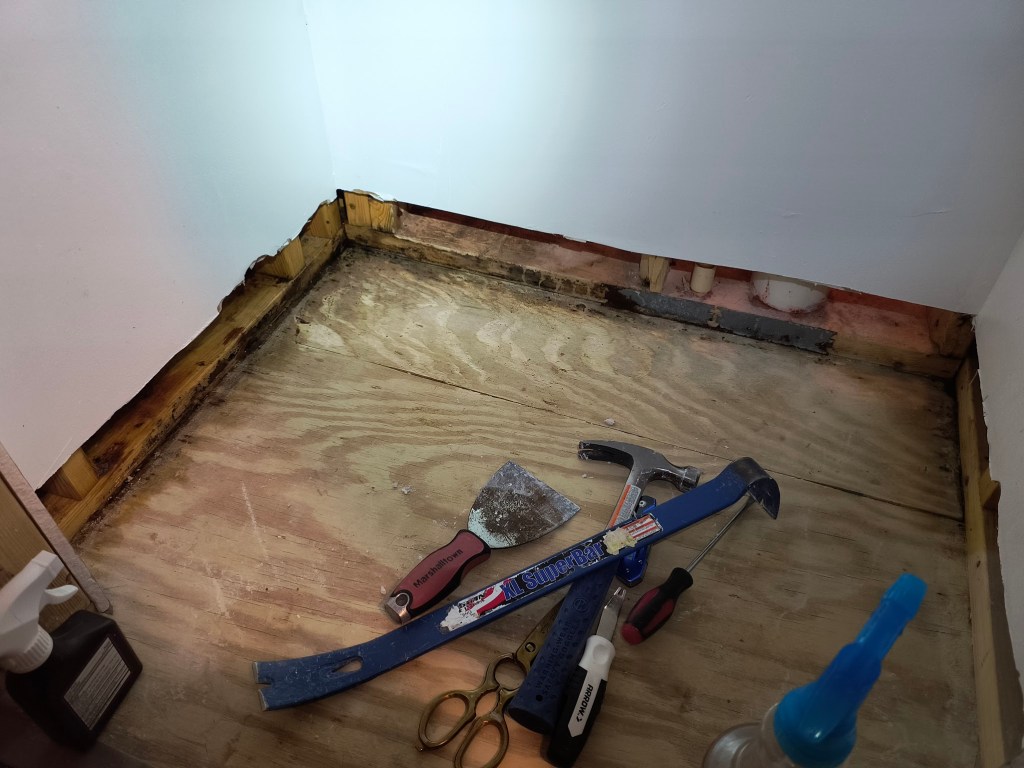
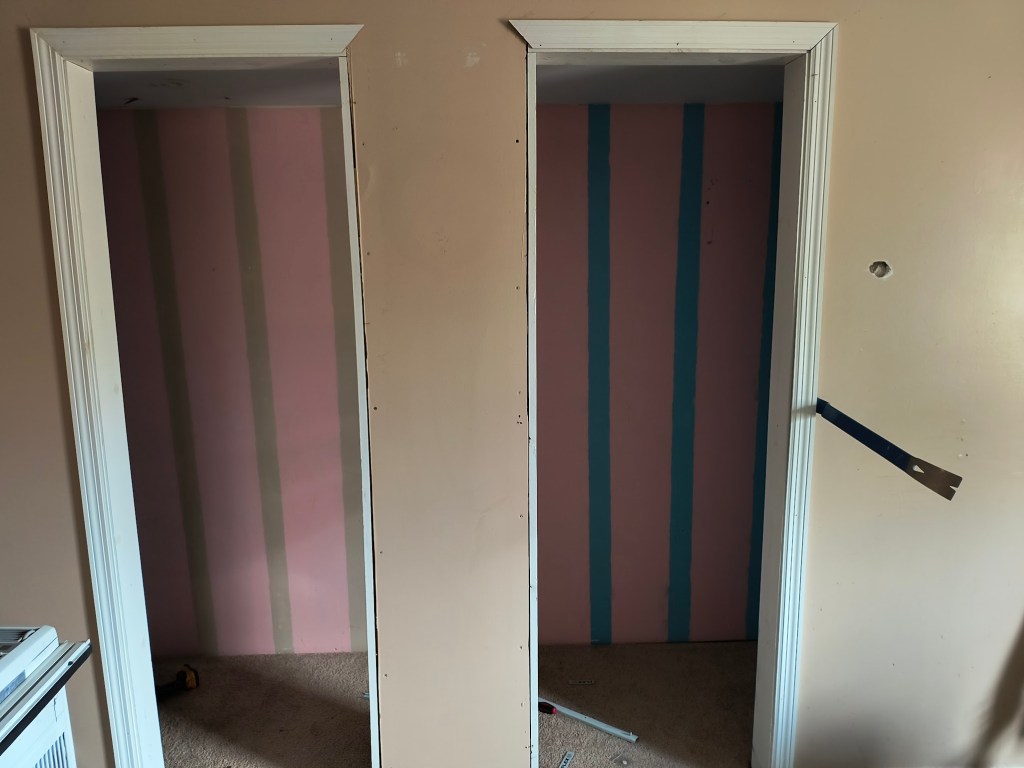
Master Closet #1

Moving right along with the master closet, we’ve patched and sanded except a few spots that need a touch-up. This week I also did some caulking where necessary. We’re almost ready for paint!

I cannot even begin to express how happy I will be to finally have this closet remodel finished and painted. Going without a closet has made me feel like I’m glamping/living out of a bag, in a way. Everything feels disorganized and messy when one doesn’t have proper storage, ya know?

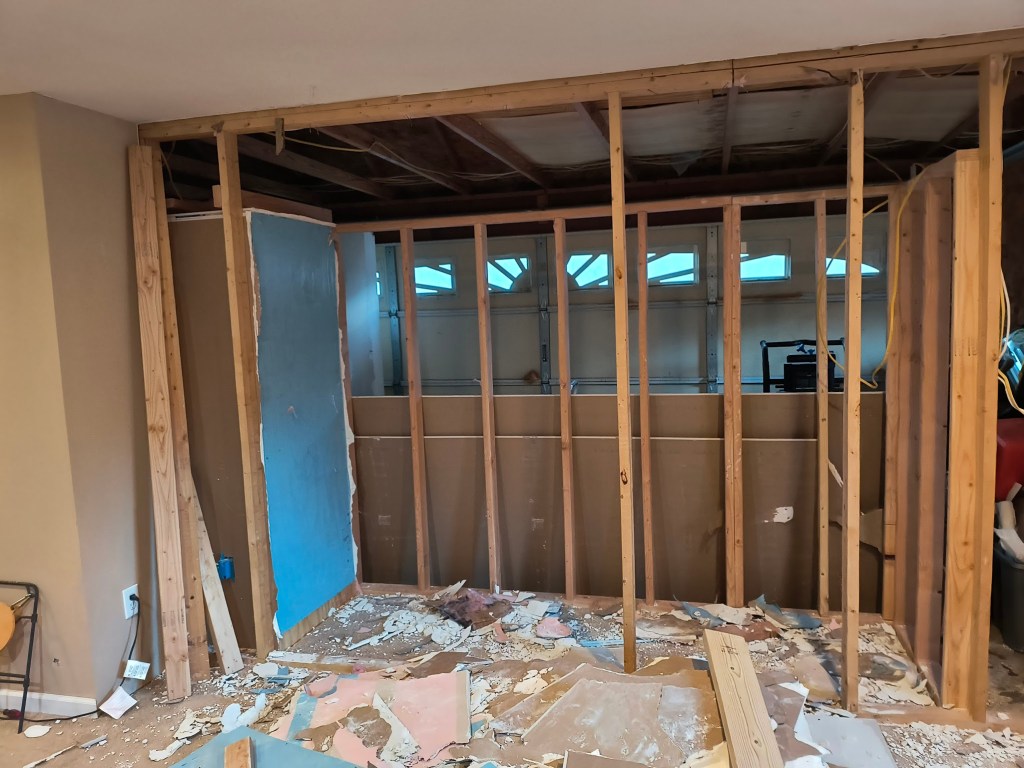
Additionally, after my closet is finished I will finally be able to clean out the pink room in the garage. I can’t wait to finish tearing it down and open up the garage the rest of the way across. We’ve also be repurposing the drywall we’ve been removing from there to patch up different areas around the house.

Photo by Kaique Rocha

Repurposing things speaks to my soul, and I do it whenever and wherever I can. It’s great for my wallet, and our planet. To be frank, it has a much bigger impact than paper straws (wrapped in plastic) or trying to do away with plastic shopping bags (yet not changing food packaging away from plastic), or any of the other good spirited but impractical ideas people keep coming up with.

Anyway, what else are we up to?  We are getting ready to build a 40’x 60’chicken yard, looking forward to moving our plants outside whenever the weather wants to stop freezing our tails off, and looking to replace our living room furniture.

Presently, we have one couch that’s barely hanging in there, and it gets crowded each evening. Is there a particular furniture brand or store that you love? Please comment below!

As always, any tips, advice, or constructive criticism is always welcome! Let’s keep it respectful and relevant and I hope everyone has a fantastic weekend!

DIY Home Improvement Projects

Current Home Improvement Project

Part 5: Mud and Taping My Closet and Painting Bedroom #1

Disclosure: This post may contain affiliate links, meaning I get a commission if you decide to make a purchase through my links, at no cost to you. As an Amazon affiliate, I earn from qualifying purchases. However, I only recommend products I would use myself and all opinions expressed here are my own.

Drywall work is much harder than it looks. Which is exactly why we are still working on the drywall in my closet, though it’s inching closer and closer to completion. Then we can finally prime and paint! It’s worth pointing out that ceiling drywall work was much harder than dear husband anticipated.

As he was trying to mud and tape the ceiling, part of the tape strip fell down and slapped him with drywall mud. After untangling himself and cleaning up, he called it a day. I can’t say I blame him, for that or the tirade of obscenities he bellowed out afterward.

Mold

Where are we at with the mold? Well, after multiple applications of a mixture of borax + water, I’m happy to report that there is no longer any mold. As a matter of fact, when looking up at floor from the basement I can see where the borax solution penetrated all the way through the subfloor, killing any mold in its path. Thus, I conclude that this is the superior cleaning method.

I’m tempted to perform some overkill with another round of bleach and/or peroxide as well. Why? Because mold is a nasty bugger that can be difficult to eradicate if you don’t catch it right away. It’s a darn shame that home inspectors aren’t allowed to peak into the walls of wet rooms, via inserting a tiny camera with a light on a cable or something. That would have saved us a lot of headache.

Anyway, my husband decided he wanted to do his own overkill method by pouring straight borax powder on the crevices. I said “Go for it. I’m all for overkill when it comes to mold.” He even made a paper funnel to get it into the area of the studs behind the studs.

I may just take it a step even further and put this primer with fungicide on the subfloor before we install the LVP tile over it.

Paint

Last week, I completed the closet and the first half of bedroom #1, including the ceiling. This week, I painted the second half of bedroom #1. I have to say, that tip from the video in the previous post about rolling the inside corners first, especially where the ceiling meets the wall, made the rest of it go swimmingly.

Why? For one thing, you spend much less time straining your neck while painting the ceiling. Secondly, using a paint roller sleeve that is covered by the nap at one end enables you to really get the paint all the way in those corners, and hit the leading edges of each wall all at the same time.

Third, you don’t have to worry about splotchy spots or scrapes from a roller with two open ends in those areas because it’s already covered, and you only have to go up to the edge of those lines. Truth be told it’s still a pain to do those corners, but not as painful as it used to be.

*Note: I also recommend using this color changing ceiling paint. It’s great for letting you see your coverage, as well as knowing when it’s dry and ready for another coat.

Long of the short, it’s all ready to go for whatever tranquil shade of blue we decide to go with. On that note, allow me to point out that picking paint colors is more complex than you might think, at least if you’re doing it right.

Nearly every aspect of a room affects how the color appears on the wall:

  • Furnishing choices
  • Natural light in the room throughout the day
  • Décor selections
  • Flooring choices
  • Lighting
  • The type of ceiling you have
  • The number of windows and choice of window treatments
  • Adjacent wall colors
  • The color of the trim

And probably a host of other things I’m not aware of because I’m not an interior designer. Taking all of this into consideration can be overwhelming.

Image by Vilius Kukanauskas from Pixabay

The current times have the price of a paint sample from Lowes at $7. A year or two ago I believe it was close to $3-4.  It’s insane how the prices of everything have skyrocketed. Thankfully, paint swatches are still free, which is a good place to start in your hunt for the perfect color. I always use those first to narrow down my choices.

It’s worth noting that in my experience paint often turns out to be 1-2 shades lighter than it seems on the swatch. Thus, I still recommend purchasing a paint sample before committing to 1+ gallons of paint that are currently (as of the writing of this article) about $30-$70/gallon.

*Note: Besides confirming your proposed color selection, samples also come in handy for minor touch-ups.

Whoa…I love that shade of green but that is a lot of green in one room.
Photo by Spacejoy on Unsplash

Before you go selecting colors or purchasing samples, there is one important question to ask yourself: Are you really wanting to paint the walls, or could you do a simpler (and more cost effective) refresh, like changing the rug, the curtains, some fun pillow covers, perhaps?

If the answer is still a resounding yes, I am writing a separate post just for you on how to pick the right paint color(s). I will be sure to link to it here when it is finished.

To sum up, we are nearly finished with the drywall work in my closet, and the mold issue in the laundry room has successfully been remediated. Bedroom #1 is refreshed and brought to a clean, neutral white, ready for color. Next on the to-do list is patching the wall in the pantry and laundry room, bringing bedroom #2 to a basic clean white in preparation for color, priming my closet, and patching random holes in the drywall throughout the house like the one pictured below.

What else is going on? We’re recovering from the flu, tending seedlings for our spring garden, reworking family schedules, and soon I will be butchering my first couple of chickens for our freezer. As the weather continues to warm up, I’ll be hatching chicks for the first time to replace them.

How about you, readers? What colors inspire you, calm you, or bring you joy? Are there colors you simply cannot stand at all? Let me know in the comments below!

DIY Home Improvement Projects

Current Home Improvement Project Part 4: More Drywall Work

Disclosure: This post may contain affiliate links, meaning I get a commission if you decide to make a purchase through my links, at no cost to you. As an Amazon affiliate, I earn from qualifying purchases. However, I only recommend products I would use myself and all opinions expressed here are my own.

This week we are focusing on 2 large tasks, and a host of small ones. The 2 large goals we set for the week are finishing the drywall installation in my closet, and mudding and taping the seams.

The smaller goals include continuing the battle against the mold in the laundry/pantry area, and continuing to paint the first kids’ room. The present goal there is to bring it from a dark, dreary hue back to white, ready for a more buoyant, relaxing color.

After installing the drywall, the next step is to backfill any drywall seams bigger than 1/8″ with joint compound a.k.a. drywall mud. This is done before mudding and taping to help prevent any cracks later on down the road. This step is pictured below. Note: you may have to repeat this step 2-3 times depending on the size of the gap.

After the backfill mud is completely dry, we can mud and tape the seams. We like to use Fiba Mesh Tape, which is self-adhering rather than having to do a sort of Papier-mâché with regular non-adhesive paper tape. It is a bit more expensive, but to us it’s worth it.

TIP: Multiple layers of joint compound may be needed for this step, with sufficient drying time between applications. This prevents your drywall from getting soggy/spongy. When applying, I like to think of it like icing a cake, just a long straight one. Some ladies might liken it to applying foundation. But I bake more often than I wear foundation, so I think of icing.

First, you slap on a good glob of this stuff, then pull it down with a putty knife in a straight line, leaving about 1/4″-1/2″ thick layer of it for the next part, feathering. This is the diagonal spreading of the mud from the center (seam) to each side in a sweeping motion, leaving short swaths of gradually thinner drywall mud as you move away from the seams.

Think karate kid: Wax on, Wax off. Except we’re not doing a circle here, just some short, stubby rays of sunshine.

Tip: When finished, you should no longer be able to see the tape. This helps to blend the drywall seams into the rest of the wall, instead of visible humps.

I know it’s not a drywall seam, because we haven’t done that part yet. Nevertheless, it illustrates the difference quite well.

If we get around to it this week, next we’ll be sanding the drywall seams in my closet. This is to further smooth and blend the joint compound we applied in the last steps. We don’t want to leave uneven lumps or lines in our feathered mud. These will also stick out like a sore thumb after painting.

We like to use our oscillating tool for this, with the sander attachments. The sand paper bits we use were black and 120 grit. There is a 12V version of the oscillating tool that is significantly lower-priced and works just fine for this task, I just couldn’t seem to find it on Amazon with the right attachments.

Note: I also recommend the lower powered one because it’s lighter, and this is a task you really want to take your time with.

Sanding with the oscillating tool does create a lot of dust, like a bag of flour exploding. But that’s kind of par for the course when sanding anything, whether using hand or power tools. We still prefer it as It’s quick, efficient, and less tiring on the body.

Note: a light touch is needed for this. We’re not trying to undo all our hard work in the previous steps.

Think like a mess you might find in your kitchen if your kids decided to secretly bake your birthday cake at 4 in the morning…but at least there won’t be egg everywhere with this, right?
Photo by Gustavo Fring

TIP: Be mindful of the angle of the sander as well, so as not to create gouges in the joint compound. I also highly recommend having a second battery ready to go on the charger rather than having to stop and wait for a single battery to charge.

All of these individual tasks are things that are difficult to explain and you have to just do it and get a feel for it. It feels kind of like trying to paint in the dark at first. Once you start getting a feel for it, it feels like you’re a kid who likes to color on the walls and you’re trying to figure out how to do it without getting into trouble.

Whoever’s kid did this hardcore playground graffiti certainly figured out how to not get caught LOL.

Right now, my husband and I are both at an impasse, while we wait for different things to dry. Him for the second layer of backfill on the drywall seams, and I for the second coat of paint.

Tomorrow, I will be applying the second coat of ceiling paint. I highly recommend this video for learning how to do it properly. When that is dry, I can shift all my son’s belongings to the finished side of the room so I can paint the second half next week. Also next week, we will hopefully be taping, mudding, and sanding.

Fellow DIYers, handymen/women, professionals, feel free to comment any tips or tricks below! I also welcome constructive feedback, but let’s keep it clean, respectful, and relevant.

DIY Home Improvement Projects

Current Home Improvement Project Part 3:

Hard Stop on the Flooring Install

Disclosure: This post may contain affiliate links, meaning I get a commission if you decide to make a purchase through my links, at no cost to you. As an Amazon affiliate, I earn from qualifying purchases. However, I only recommend products I would use myself and all opinions expressed here are my own.

At this point, we are finished installing the new flooring, all except two rooms: the laundry room/bathroom on the first floor, and the Master Bathroom on the 2nd. The master bathroom will have to wait until we are finished adjusting the plumbing for whichever type of body washing station we decide to install.

The laundry room bathroom, however, is a different story. During the process of removing the old linoleum, I encountered a setback: mold. It was clinging to the baseboard I pulled off the wall, and the bottom of the linoleum. I had a bad gut feeling that it didn’t end there.

I didn’t stop to take a photo of the nasty linoleum, because it was gross and contained sharp edges.

Thus, since I couldn’t continue with the new flooring install until it was eradicated anyway, I decided to open up this hot mess of a wall beside the washer to see if there was mold there too.  Sure as 2+2=4, there was. It was only a question of just how high up it went. Shrugging, I thought to myself, “Well, I have to tear out that whole botched repair section anyway to fix it. Let’s start there.” Dear God.

While nowhere near as bad as it could be, it still turned my stomach to touch that hairy drywall. I could feel the nasty, festering fibers through my gloves. Armored with protective gear, and bleach spray at the ready, I disinfected, gutted, and bagged it. I hoped it would end there. Yet, the logical part of my brain (coupled with many years of raw life experience) said “Nope.” Sure enough:

Unfortunately, it is in the layers of the plywood subfloor. In case you don’t know, pulling up builder-grade installed subfloor is a massive pain. What’s worse is when you’re removing it because it’s water damaged and moldy/mildewy. Why? Because it crumbles and splinters apart, instead of coming off in one or two big chunks.

I went through that upstairs in the master bathroom. The previous owners had failed to repair the rubber seam strip at the bottom of the old shower stall that was meant to protect the floor from water seepage/shower spray (pictured below).

This is 100% preventable, people. And it is such an easy, quick, and inexpensive fix!

All that mess, all because of this not being fixed in a timely fashion:

Stay vigilant ya’ll. Water is great…until it ends up where you don’t want it and ruins your house.

Back to the topic at hand: the mold problem downstairs. I thought please, PLEASE let this be the end of it. Going without a washer until we repair the laundry room floor, or figuring out how to re-pipe the water lines to move the laundry downstairs (at least temporarily) is headache enough. Wrong again.

The Pantry

To my dismay, I discovered the exact same problem on the other side of that wall, in our pantry. However, there wasn’t much mold on the baseboard or drywall. It was worse…this rancid affliction seems to have contaminated some of the studs, the studs behind those studs, and infected the subfloor on this side as well.

And so, instead of a simple removal of the old floor, installation of the new floor….we now not only have to remediate the mold, potentially relocate our laundry, tear up the subfloor, tear open the walls, and possibly replace a few 2×4’s. All to repair a problem that was not properly dealt with in the first place.

TIP: If you have a pipe leak or flooding of any kind inside your home, keep an eye out for mold. Here’s how to deal with it if it occurs:

Step 1: Shut off the water supply at local shutoff valves if the area has them. If not, shut off the main water supply.

Step2: Fix the leaking pipe or source of flooding.

Step 3: DRY everything out thoroughly by soaking up and/or removing the water and using a space heater to dry it the remainder of the way as long as it is safe to do so. Emphasis on thoroughly.

Step 4: Watch out for mold. If it starts to creep up, tenaciously kill the crap out of it. Bleach, peroxide, or vinegar are all tried and true methods we have discovered. Or screw it, smite it with all three, alternating which one you’re using. Never mix household chemicals. Or ye might smite thyself. It may take a while, (weeks or months to completely eradicated it depending on the severity) but remain steadfast and DEAL with it.

Step 5: Only when you are 100%, bet-your-life-on-it-sure that ZERO mold or moisture remains, patch the wall back up, the right way. TIP: What you use depends on how big the whole is. According to the Natural Family Handyman, a general rule-of-thumb for drywall repairs is as follows:

  1. Holes up to about 1/2″ can be filled with most wall patching compounds, such as drywall compound or light duty spackle.
  2. Holes between 1/2″ and 6″ can be repaired with a piece of drywall and drywall compound. 
  3. Holes larger than 6″ can be repaired with a piece of drywall and drywall compound but should have reinforcing wood strips installed in the wall to support the drywall edges.
  4. Since wall studs are a maximum of 14 1/2″ apart, very large repairs will bridge across one or more studs.  We’ll talk about large repairs in another article.

If things go horribly wrong, or you feel the repair is above your paygrade (you lack the required skills or comprehension), don’t be afraid to call in a professional. Better safe than sorry. Whatever you do, don’t be the like the Cumberworlds 1 that ignored it and thus left this problem to us.

Back to the Closet

I’m going back into my closet to party with my skeletons, ya’ll. On a serious note, since we are at a kill, and kill again phase with the mold problem downstairs, I am back to working on my closet upstairs in between murderous spraying sessions.

Besides, I am at an impasse with Project Turn the Garage Back into a Flippin’ Garage until we finish my closet. (Pictured below is where I’m at with the garage.) At that point, we can finally relocate our closet effects into my closet since it will be finished first. We still have plumbing to relocate before we can finish his. The Garage undertaking will be a separate post.

In any case, last week we purchased and carried the drywall upstairs. The second part of that ordeal was thanks to my brother coming to the rescue to help my husband carry it. There is no way in hell I can help carry 104+lbs of drywall 4 times up the stairs. Thanks Jon!

Consequently, I was not so ruthless as to ask my husband to do anything for the rest of the weekend. Nothing involving heavy lifting anyway 😉. This week we are finally in the process of installing it. The side walls aren’t too much trouble, just cutting around outlets and/or switches as needed.

Just look at those clean lines! First time for everything and I think I nailed it!

For the doorway, however, we needed some special tools, at least according to an article I read at thisoldhouse.com. First, I purchased a jab saw (paid link), Dewalt of course. I have yet to be disappointed by a single Dewalt tool we have bought. Then a rasp, for cleaning up the ragged edges. This Jorgenson one (paid link, pictured below) is phenomenal! Seriously it is a dream to use. It has been my experience that Jorgenson is also a quality tool brand.

Here’s why I love it so much: the ergonomic grip, and the extra tab grip on the end, down to the easy thumb tension screw for quick blade changes. Speaking of the blade, that thing is sturdy and substantial! I feel like I could shave up rock sculptures with it, even though I only bought it for sheetrock.

Last but certainly not least, I bought these oscillating tool blades (paid link) specifically made for drywall. I absolutely had my doubts when I saw where they were made, but they have been the best cutting tool in my arsenal for this job.

I still used the jab saw for cleaning up my cuts and precutting corners. Precutting your corners helps ensure that you don’t cut past where you want to stop. It also came in handy for smaller cuts like cutting around switches and outlets.

It’s worth noting that, unless you do this for a living (or a similar task), and possess the strength and endurance required for hand-sawing a doorway hole in drywall (hats off to you, I salute you sir/ma’am), the oscillating tool (with a proper drywall blade) is a necessity.

I am just a slightly overweight, currently out-of-shape, busted up vet. Honestly, I’m still trying to get my strength back from my shoulder injury 3 years ago. Not gonna lie, I’m weak as hell right now. So, I need the help of power tools at the moment. (If this is you, don’t feel bad. No judgment here. Besides, power tools are fun and sexy.)

Some lessons learned from this project:

  1. Installing the outer doorway side before cutting allows you to use the studs as your guide, cutting it out from the inside of the closet. Obviously you will need a friend to install it from the other side. It is much easier to make the cutouts after hanging it so you don’t have to do a bunch of measurements.
  2. After removing the door casing, and before you get stuck behind the drywall, don’t forget to tap or remove the nails that were holding it on. Or you can just take a hammer in with you.
  3. Also before you get stuck behind the drywall, double tap that you have all the tools you could possibly need for the task. If push comes to shove and you forgot something, you can always cut a hole in the part you are cutting away anyway and your buddy can hand it to you. Or if they walked off to the bathroom and you don’t feel like waiting for them to come back, you can cut a hole big enough to walk through and get it yourself like you should’ve done in the first place lol.
  4. Don’t underestimate the amount of dust you are about to kick up, especially using the oscillating tool. Be ready with your safety gear (ear and eye protection, and an N95 mask or respirator). I also like to throw on a bandana so I don’t get as much drywall dust in my hair. But hey, if you have oily roots, screw it, you can leave your hair exposed and use it as a dry shampoo.
  5. Obviously, don’t blind-cut around any switches or outlets, or even try to cut around them with the drywall installed. Even if you measured, or even if you can see where you’re cutting, you don’t want to accidently electrocute yourself. Measure and pre-cut those before hanging the drywall.
  6. If you are shorter than the doorway, don’t forget a stepladder for cutting the top of the doorway. Proper leverage isn’t just for safety, but also precision and comfort.
  7. Be mindful of the outward pressure you may be exerting while cutting, to avoid breakage of the parts of the drywall you would like to stay attached.

For cleanup, once again I’m reaching for my handy dandy Dewalt shop vacuum. Trust me, do NOT put drywall dust through your poor household vacuum cleaner that already has to deal with you and/or your family’s hair, pet hair, dust mites, crumbs, and whatever else you put it through. It will quit on you faster than it should, and before it does that, it may start screaming at you like this:

Yes, quite unpleasant. I can’t use it anymore without earpro. Do yourself a favor and learn from our silly mistakes. In other news, in between hanging drywall and killing mold, I’m working on painting our childrens’ bedrooms. Goodbye, mournful mauve paint.

Currently, there’s only one coat on half of the room, but it already makes such a difference. I am excited to pick out the color (with our son’s input) and go from hotel towel white to an uplifting, yet relaxing hue.

Caption: It ain’t pretty, but it is sure as heck less ugly.

To sum it up, we’re still working the master bathroom remodel, battling mold, drywalling my closet, and painting our kids’ bedrooms right now. It seems like a lot to be doing at once, but when you consider that each project requires drying times at some point in the process, it’s not bad.

We’re also trying to decide how we would like to do our stairs, now that we have the old, nasty, carpet ripped off of it. There will be a separate post about the ins and outs of that project when we are finished with it. For now, they will just have to be naked. At least they’re clean.

All of these projects keep me productive and working towards our goals for our house, rather than just being stuck. Which in turn, helps me stay out of my head and keep my PTSD in check. Now I want to hear from you! Are there any tips, tricks, or tools of the trade for mold remediation, repairing water damage, drywall, or painting that anyone would like to share? Please comment below!

Stay tuned for the next episode of our Current Home Improvement Project.

  1. Also called a cumberground—someone who is so useless, they just serve to take up space. (Jones, 2023) ↩︎
DIY Home Improvement Projects

Current Home Improvement Project Part 2: It’s a Process, and Not Just a Physical One.

Disclosure: This post may contain affiliate links, meaning I get a commission if you decide to make a purchase through my links, at no cost to you. As an Amazon affiliate, I earn from qualifying purchases. However, I only recommend products I would use myself and all opinions expressed here are my own.

For those who have yet to embark on such a journey, you may be wondering what it’s like to take on a major home improvement project. Well, to be frank, there have been many points in this process where I’ve thought to myself:

“What the hell did you get yourself into??” or “We’ve bitten off more than we can chew.” It’s felt downright overwhelming sometimes, but it has been worth it. It is worth it. I’m gaining new skills all the time, and honing others. This gal is just not content to sit still and look pretty.

“Grit is not just a simple elbow-grease term for rugged persistence. It is an often invisible display of endurance that lets you stay in an uncomfortable place, work hard to improve upon a given interest, and do it again and again.”

– Sarah Lewis

I’m finding out exactly what I’m made of, or rather, being reminded: strength, perseverance, grit, determination, and ambition. I come from humble beginnings, and I am still nowhere near affluent. But over time, I have learned you can take some junky stuff and make it good, nice stuff.

I’ve done this with furniture, recycled items, and even a car project before. But I never dreamed I would one day be applying this concept to a house. At times, I still cannot fathom that I am actually taking this on.

Painting a wall or a room is one thing. My first experience with that was a few years ago. I agreed to rent my friends house who was leaving the area, if I could paint the master bedroom. The walls where poo-brown, matching the poo-brown carpet. Yuck. Depressing.

She agreed, and I painted it a beautiful, vibrant, yet relaxing hue of blue, completely changing the feel of that room. It went from feeling like a dungeon or creepy truck stop bathroom, to a relaxing, uplifting space to unwind and sleep in. Notably, it was more challenging that I thought it would be, but it definitely paid off.

Painting the entire interior of a house is another. I did that for the first time a few years later, when we bought our first starter home. I will be writing (and providing a linking to) a separate post about that later on. That was my first major home improvement project.

However Remodeling1 part of a house, or renovating2 a significant portion of it, are both entirely different concepts. Both involve considerably more work, and require learning skills you never thought you would need. I’m so thankful for resources like YouTube and other home improvement blogs like Family Handyman and This Old House. The awesome fellow below showed me how to remove a bathroom vanity without messing up my walls:

The other option, of course, is hiring these tasks out to professionals (if necessary and you can work it into your budget). We prefer to take the DIY route not only for budgeting reasons, but also for the new life skills and experience we are gaining. Although, admittedly, some days this feels absolutely insane. Scary, even.

On the contrary, most days it is a truly rewarding journey. I’ve learned so much that I never would have otherwise. Not to mention the tangible validation. Something real that you can see transform and improve before your eyes, and the satisfaction that only comes from knowing that you made it happen.

I know it will be worth it in the end, as already evident in the areas we have finished. I am confident that this will be a significant return on investment. This may be the nicest house I have ever had the good fortune to live in. Now let’s dig in to the nitty gritty! (Literally…see below photo. UGH.)

Water

The old water filter.

As I stated in the previous article, the first project we took on was the water filtration and softener system, for obvious reasons. Health concerns, staining and scaling, and the unpleasant sulfur smell. After doing my research, I chose this system from Springwell. I especially liked that they have a 6 month guarantee on their products, which is much longer than any other company I checked out.

We also replaced our toilets, so the state of the tank wouldn’t burn out our under sink water filter (Paid link. And it’s currently-at the time of this posting-on sale! Read about why I love it below.) before we could install the new main house water filter. I have NEVER seen a toilet tank that looked like this:

And yet, all four toilet tanks looked like that. Side note: Why the heck are toilets so dang expensive??

Quick note about the linked product above. That water filter is amazing, and made in the glorious U.S.A. I bought the first one when I lived in a border town in Texas, and I discovered that our tap water was making us sick. Montezuma’s revenge3 is common knowledge. However, this was on the U.S. side.

Installing this stellar under sink filter (no loss of precious fridge space!) solved that. Their customer service is also excellent. When this filter which is supposed to last 5 years, burnt out in 2 years, I contacted customer service. After explaining the situation, they quickly replaced it, free of charge.

Flooring

The next item on our agenda was the flooring. To my surprise, picking out flooring was just as involved a process as picking out paint colors. Many trips back and forth to flooring and home improvement stores to see what they had to offer and taking home samples to see how it would look in our space. Rinse and repeat until we were happy.

The winners!

The luxury vinyl plank flooring we chose is produced by Stainmaster, and it is advertised as waterproof, pet proof, quite durable for houses with busy families. This means we could have used it throughout the entirety of our house, and many choose to do that. However, we’ve always liked the look of a different flooring option for the wet areas (Kitchen and bathrooms).

For these areas, we chose a luxury vinyl tile (also by Stainmaster) that complimented our wood planks beautifully. The only hiccup was a 1mm difference in thickness, which had to be made up by a 1mm underlayment. No big deal. Both of these options also have a wonderful texture to them, as close to the real thing as I believe exists for luxury vinyl plank/tile flooring.

After we finally finished choosing and ordering our flooring, we had to prepare for the installation. This involved first moving furniture if needed, removing baseboards, door trim, doors, and door casings. Then tearing up the old, nasty flooring, and prepping the subfloor (bleaching the hell out of the pet urine affected areas and vacuuming).

See that discolored bit there in the above photo (right)? That is old pet urine that was never cleaned up properly and seeped onto the subfloor below. Gross. After cleanup, we filled any gaps in the subfloor bigger than 1/8″ with plaster, and added screws to any squeaky parts, which are caused by loose nails. We also found we had to touch up and fan out the plaster that already existed to smooth out a ridge in the floor (pictured below). Based on my research, this can occur as a result of settling of the house.

Finally, after the arduous process of preparation, we began laying the clean, new, beautiful flooring. Yay! We chose to start in our bedroom, as it was already empty and we wanted to move out of the garage as soon as possible.

We found that the hardest part of the installation is getting through the learning curve and knowing what the heck you’re doing. Besides that, the first couple of rows are like trying to dress a toddler who missed their nap and is also a cat. Once you conquer that, though, you’re golden!

Cutting around doorways and such does require acumen and precision yet seems like a cakewalk compared to installing the first couple rows of flooring. Still, if you struggle with complex math, especially geometry, this part may seem akin to trying to play charades with a blind person.

Secondly, I highly recommend getting a pad to place underneath your knees, or a set of kneepads. I found the kneepads I was using to be more annoying than helpful, as they kept sliding down no matter how much I ratcheted down the straps. Thus, I ended up buying this Kobalt pad from Lowes, and sliding it along wherever I needed it.

Other things to keep in mind whilst installing flooring:

  • Remember to vary both the seams and grain styles of the planks in a randomized fashion. Varying the seams is very straightforward, you simply change the size of the cut pieces used on the ends. Varying the styles takes a bit more brain power, planning the layout of 3-4 rows at a time.
  • Be mindful of not repeating a row of the same pattern of styles too close to the last one. For example, if you use style 1-2-3 on the 1st row, don’t repeat that exact same pattern until row 3-4.
  • Patience is key! The connecting edges break very easily. So take your time, and many deep breaths during the process. If you feel like you are rushing or starting to become frustrated, it’s time for a break and a nice, refreshing beverage!
  • Lastly, it really helps to have a second person, for a multitude of reasons, including the installation of the first couple of rows, carrying the heavy boxes, swapping out on different tasks, and another set of eyes for tips 1&2 above.

Side note: I have a deepened respect for people that do this or other construction/manual labor jobs for a living. I totally understand why dudes (or chicks) with manual labor jobs are so beat by the time they come home now. All I wanted was a cold beer, a comfy chair, and dinner by the time I was done each day of this project.

Photo by Miguel Gonzalez on Unsplash

I almost wanted to cry when we finished the first room. Not sure whether that feeling was born out of physical pain, exhaustion, or joy that the first room was over. Indeed, it might have come from knowing that we had so much more to do. Seriously, if you are over 30, keep the Ibuprofen and ice packs handy.

Photo by Miguel Gonzalez on Unsplash   

I don’t have many photos of this process, as we were just waking up and grinding away every day on this. We just wanted to get it done as quickly and efficiently as possible. If we stopped to think about it for too long, it was demotivating. We still have the laundry room and our bathroom to do, and then we check this project off of our list of repairs.

After that, the next step is to paint the walls in colors that don’t resemble urine (blech!) and depression (meh…). Then we can paint and install new baseboard and door trim, and in many cases, new doors. I haven’t the slightest idea what kind of zoo was being run here before us, but at least two of the doors upstairs were cracked, like someone was trying to kick it in at some point.

Funnily enough, one of door casings for those cracked doors also broke while we were trying to remove it for the flooring install. This happened because we didn’t realize there were huge nails and screws holding it on. The divots had been covered with caulk and paint.

For those not yet aware, the correct hardware to use for this application is finishing nails, not whatever happens to be lying around.

Unfortunately, we will have to wait for spring to do the baseboards and trim, because the weather is disagreeable for painting right now unless you have a controlled environment (heated) room in which to work. The weather recommendation for best (drying and adhesion) results is 50 to 85 degrees with humidity levels between 40 and 70 percent.

That’s plenty alright with us though, as we still have a myriad of other things to keep us busy in the meantime. Not to mention, it feels like we are working at a snail’s pace. That could just be my crazy ambition and drive talking though. Many times I feel the urge to sprint when I know I need to casually stroll.

More often than not, I have found that just about anything you need to fix on a house or vehicle takes considerably longer and costs more than you initially think it will. Usually the task at hand ends up being much more involved than it first appears…at least if you are trying to do things the correct way.

  1. Remodeling: altering a structure from its original construction, whether interior or exterior. i.e. changing the layout of a bathroom. ↩︎
  2. Renovating: to restore or repair a structure. This can include replacing or repairing outdated, worn, or damaged parts of a building. i.e. refacing cabinets, installing new light fixtures, repairing a wall, etc. ↩︎
  3. Montezuma’s Revenge is diarrhea that is commonly experienced by people traveling south of the U.S. border, particularly Mexico and Central America. ↩︎
DIY Home Improvement Projects

Current Home Improvement Project

Part 1: The First List of Repairs

When we bought this house, we knew it was a fixer upper. Certainly not terrible as far as fixer uppers go, but during our final walk-through even our realtor said to us, “I hate to say this to you guys, but you’ve got your work cut out for you with this place. Good luck.” So, here’s our list of the most apparent and/or urgent things we noticed we would have to fix.

First and foremost, we noticed that all the flooring needed replacing. Between pet damage, being considerably dated, and/or a shoddy, incorrect installation, it had to go. We decided we would be replacing all the trim for the floor and doorways as well, due to the pet issue.  

Second, the master closets truly left something to be desired. One was rather odd in its shape (see photo, who does that?), and the other seemed more like a broom or coat closet in size. For fork’s sake, BOTH of our KIDS’ bedrooms had better closets than ours.

Decluttered for clarity. 45 degree closet entrance? Really? And the door is not even centered on the wall.

Third, we planned to remodel the master bathroom to maximize the space and rid ourselves of the dated, urine-colored shower stall, and the dreaded oversized tub. I don’t think anyone ever truly uses these tubs that claim a ridiculous footprint, yet it’s advertised as an amenity. 

Seriously, look at all that wasted space!         

We also wanted to install a double vanity, a lovely feature we have come to enjoy in previous homes. By removing the tub and relocating the shower stall in its place, we were able to move (and expand) my dear husband’s closet. It’s actually a very similar square footage, but the space is far more efficient in the new layout.

This also resulted in more square footage (hello double vanity possibility) for the sink area that the closet was previously encroaching upon. I just LOVE his and her closets, don’t you? I prefer my closet a certain way with a certain level of organization. Sharing a closet tends to inhibit such ideals.

Fourth, we noted that the water system was showing its age, likely at the end of its life. This was the first project we took on, for obvious reasons. We replaced the dated (and disgusting) water filtration and saltwater softener system with a top-notch water filter and salt-less softener system from Springwell. No more sodium-infused, fart-smelling, severe staining water for us, thank you.

The old water filter…Yuck.

Side note: just because your well water passes inspection for the sale of the property, doesn’t necessarily mean safe to drink or that it won’t cause health problems. Did you know that during a well water test, the ONLY thing they are required to test for is total coliform and E. Coli bacteria?

Apparently our society is still not concerned enough about heavy metals, PFAS, microplastics, or other harmful, potentially deadly microorganisms enough to require a test that covers those as well for home purchases. Nevermind the multitude of studies that have proven the harm of these contaminants. You can read more about that here.

Fifth, when we finish the work in our bedroom, we plan to move out of the in-law suite in the garage and turn it back into a garage. Once I had a garage, I never wanted to go without one. If you know, you know. If you don’t, one day you’ll understand. It’s a hangout spot, quick access to tools and car maintenance, and extra storage, to name a few benefits.

Sixth….the godawful paint job. From sloppy painting, to painting straight over nails, holes, bumps in the wall, and the duct tape holding the front door weather guard on. Then there’s being able to see the paint color underneath as if they had used watercolors…yikes.

Not to mention, I recently learned that the color yellow apparently makes my husband angry. Unfortunately for him, that color is on the majority of the walls to include the kitchen, hallways, living room, and dining room. The kids rooms, however, are both painted a depressing, dull, grayish-lavender color that they don’t even like.

Important note: the flash of my camera (to highlight the sloppy paint job) makes this hue seem brighter than it actually is. It is very dreary in person.

Seventh, there’s just updating and modernizing that needs done. For example, when we moved in, there was an under the cabinet radio, which was popular in the 1980’s. (Yes, that’s 40 years ago now.) Part of the face of it was melted to give it character I guess.

The under-cabinet mounted microwave didn’t work, and the appliances looked like the same ones that had been installed when the house was first built over 20 years ago. I can understand that though. Appliances are expensive. Use what you have until it breaks. But why does it always have to be Frigidaire? Likely answer: it’s probably the cheapest. They certainly perform like they are in my experience.

Ditto for the basic, plain, laminate countertops, dated ceiling fans (one of which is inoperable, just collecting dust), old light fixtures, you name it. It is like a house frozen in time. Never updated, a number of things that were never properly repaired, etc. Just slap some different paint on it and sell it. Like putting lipstick on a pig.

Sadly, this is just one of many such examples.

We also had our work cut out for us outside. All manners of trash were just thrown into the woods and brush. Everything overgrown, widow-maker trees1 galore, poison ivy, sumac, oak growing on everything, sucking the life out of healthy trees. In many areas, the brush was so thick, even my husband’s DR Brush Mower couldn’t hack it. Enter Cletus, the sawn-off push mower turned beast.

Meet Cletus. He’s a beast!

To date, I’ve counted 8 tires, countless beer bottles and cans, wads of random trash, broken toys, 4 busted and rusted bikes, a mangled trampoline, Rubbermaid bins full of nasty blackish-green pond water, and a bunch of other crap.

We spent months clearing out all of that trash, then the brush, then the dead and rotted trees waiting to fall on us as we walk the property. We also rid ourselves of an army of this invasive, foul-smelling species of tree called a “tree of heaven” that attracts spotted-lantern flies.

If you don’t know what those are, they are pests that attack healthy trees in swarms, and have a kill-on-site recommendation placed on them by environmental organizations. Get rid of their favorite tree (tree of heaven), you get rid of the spotted-lantern fly main attraction. While it is likely that you will still spot a few of them now and then, it seems logical that it will be in far fewer numbers.

Once we finish the cleanup and clearing process, we will be refurbishing the land with grass, clover, wildflowers, and groundcover plants. And we will finally be able to starting planning where we can put our garden, food forest, plant more evergreen trees, and establish an outdoor entertaining area.

On the bright side, it made this house one of the more affordable in the area, and it was just enough of a fixer-upper that most who viewed it didn’t want it and the others put in bids much lower than ours. The previous owners mayhem and mishaps made it possible for us to acquire it and thus be much closer to family. I call that a silver lining.

  1. Widow-maker=trees that are waiting to fall and unexpectedly and fatally crush you at any given moment. ↩︎