
Hard Stop on the Flooring Install
Disclosure: This post may contain affiliate links, meaning I get a commission if you decide to make a purchase through my links, at no cost to you. As an Amazon affiliate, I earn from qualifying purchases. However, I only recommend products I would use myself and all opinions expressed here are my own.
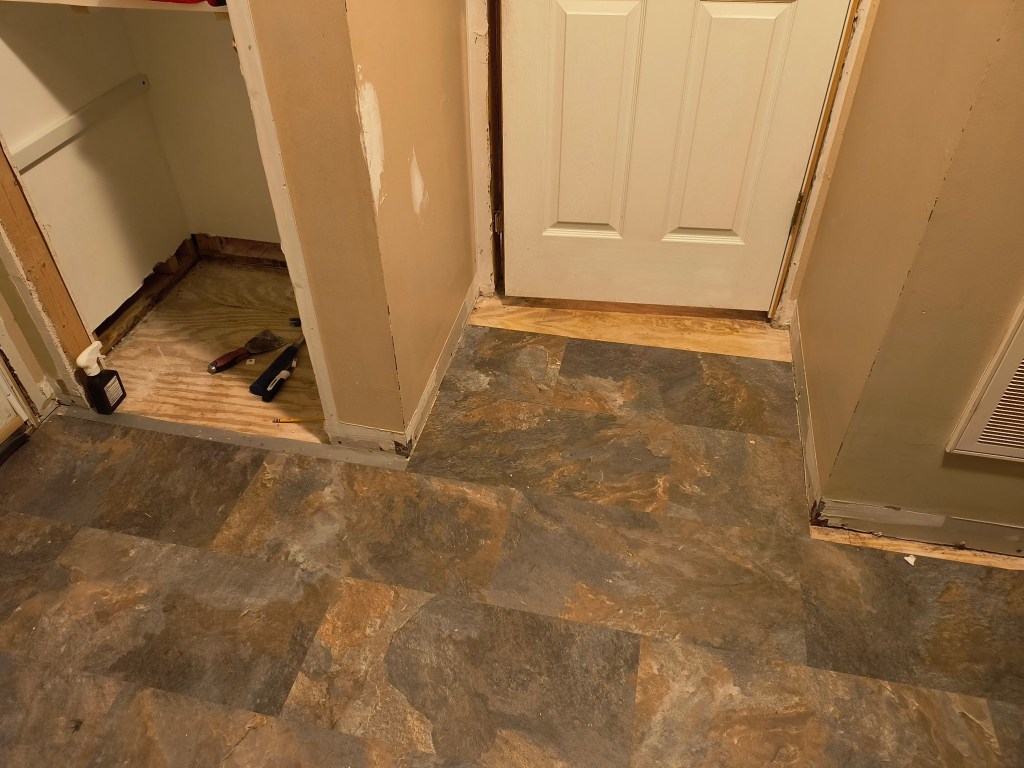
At this point, we are finished installing the new flooring, all except two rooms: the laundry room/bathroom on the first floor, and the Master Bathroom on the 2nd. The master bathroom will have to wait until we are finished adjusting the plumbing for whichever type of body washing station we decide to install.
The laundry room bathroom, however, is a different story. During the process of removing the old linoleum, I encountered a setback: mold. It was clinging to the baseboard I pulled off the wall, and the bottom of the linoleum. I had a bad gut feeling that it didn’t end there.
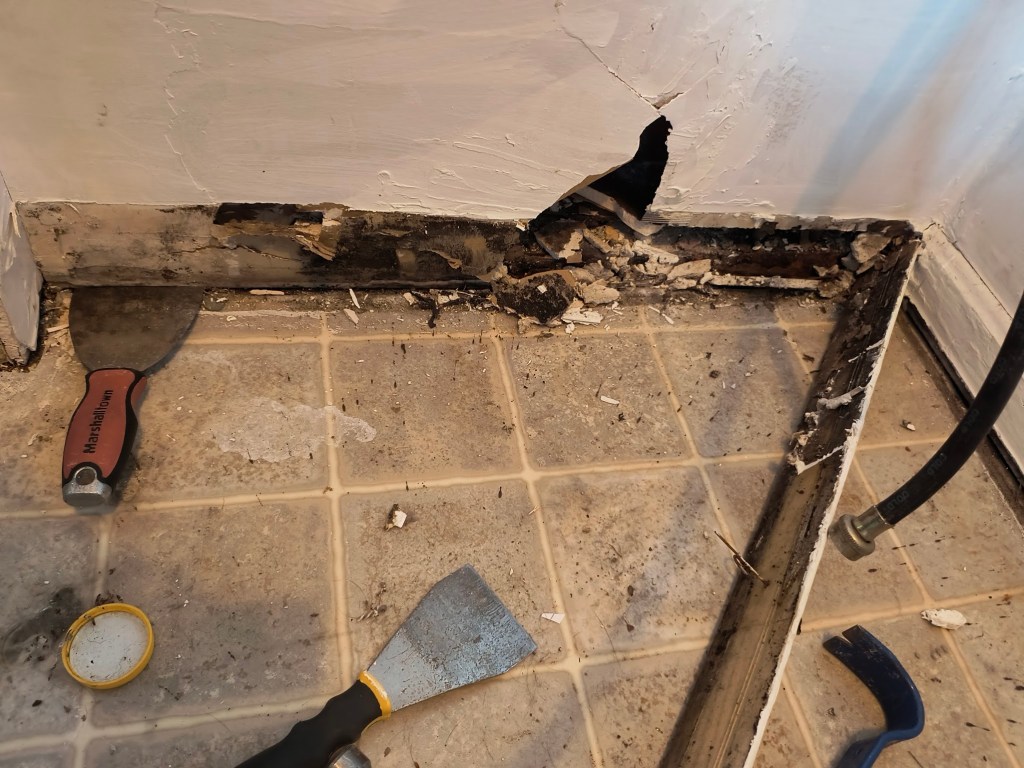
Thus, since I couldn’t continue with the new flooring install until it was eradicated anyway, I decided to open up this hot mess of a wall beside the washer to see if there was mold there too. Sure as 2+2=4, there was. It was only a question of just how high up it went. Shrugging, I thought to myself, “Well, I have to tear out that whole botched repair section anyway to fix it. Let’s start there.” Dear God.
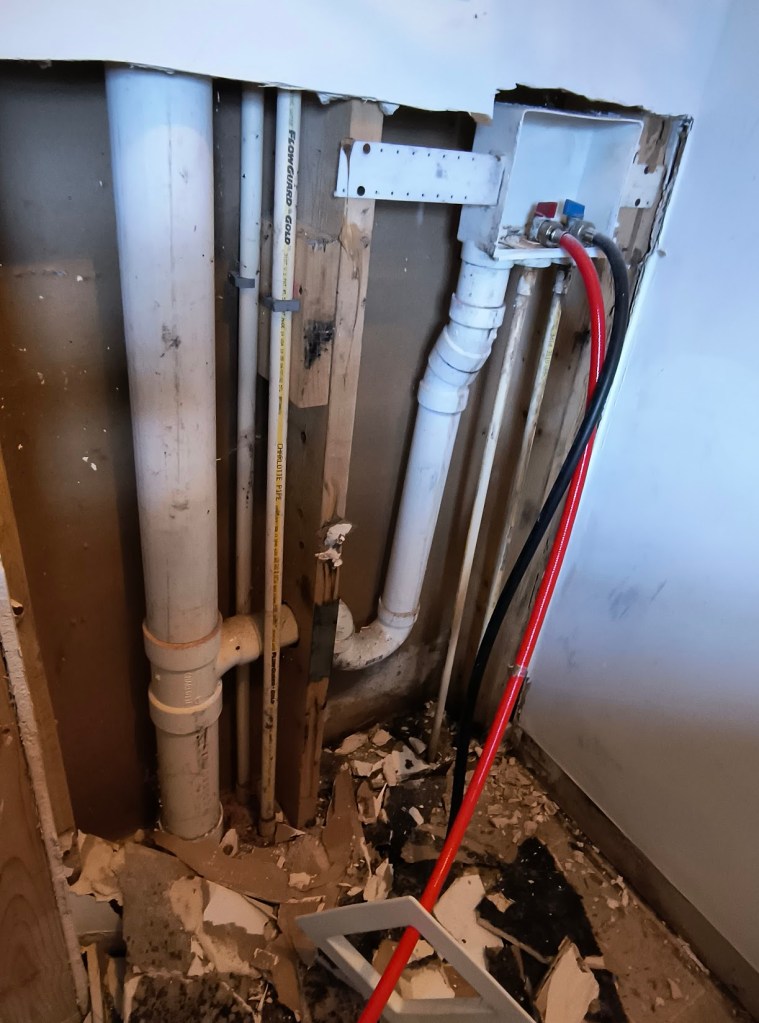
While nowhere near as bad as it could be, it still turned my stomach to touch that hairy drywall. I could feel the nasty, festering fibers through my gloves. Armored with protective gear, and bleach spray at the ready, I disinfected, gutted, and bagged it. I hoped it would end there. Yet, the logical part of my brain (coupled with many years of raw life experience) said “Nope.” Sure enough:
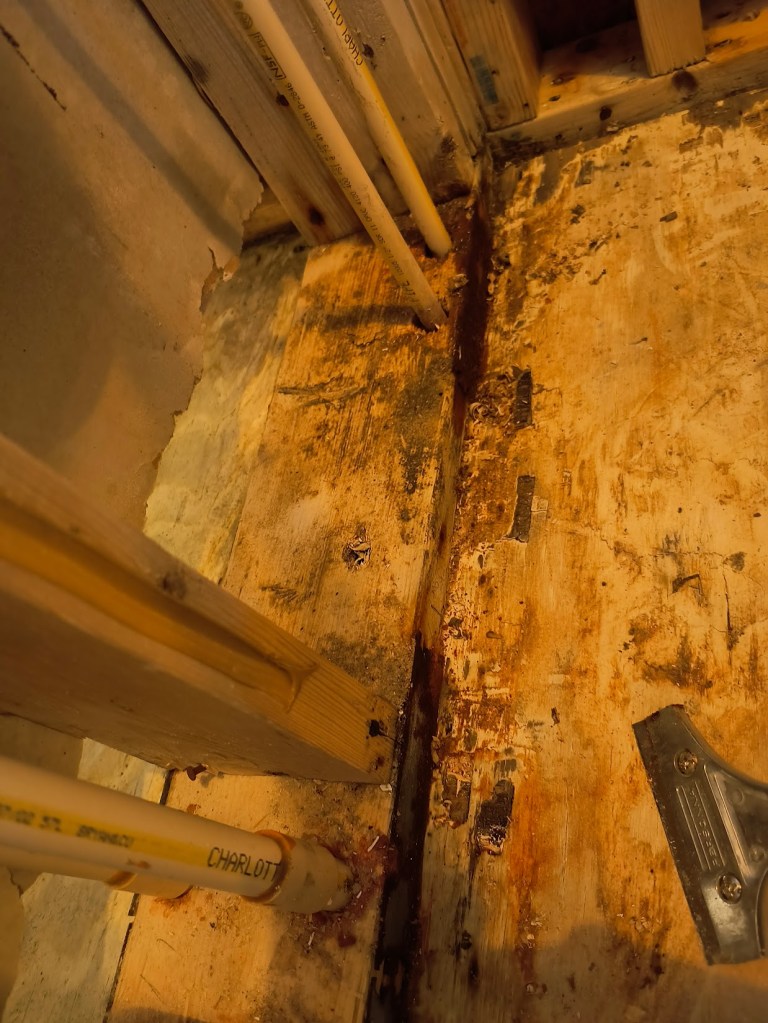
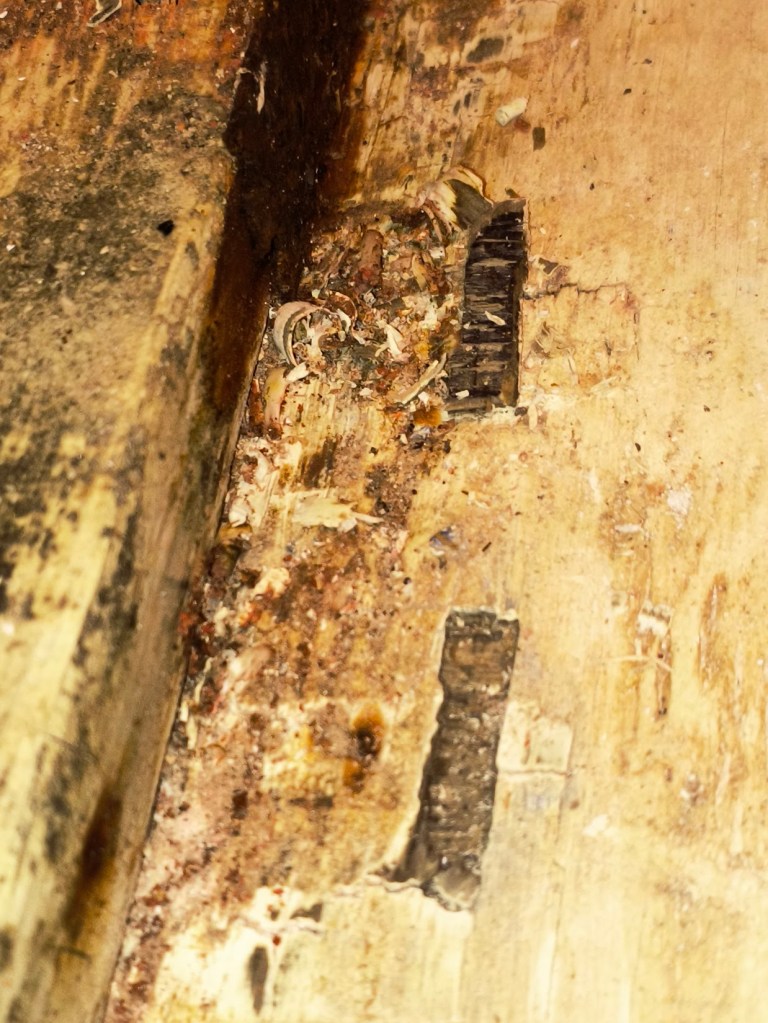
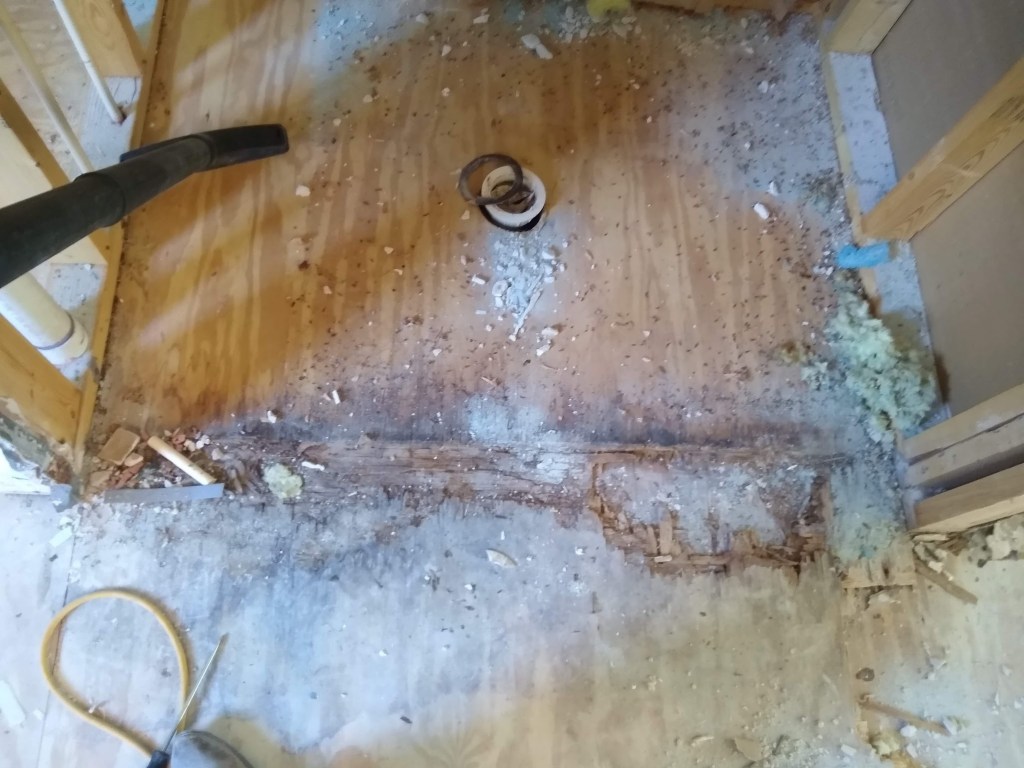
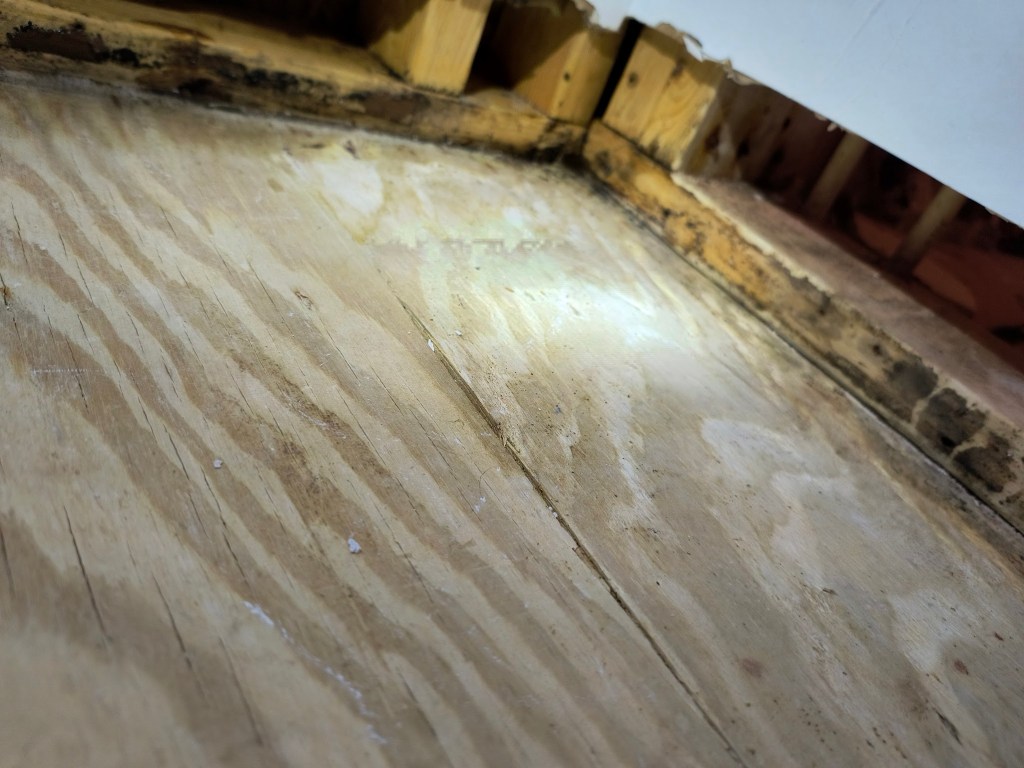
Unfortunately, it is in the layers of the plywood subfloor. In case you don’t know, pulling up builder-grade installed subfloor is a massive pain. What’s worse is when you’re removing it because it’s water damaged and moldy/mildewy. Why? Because it crumbles and splinters apart, instead of coming off in one or two big chunks.
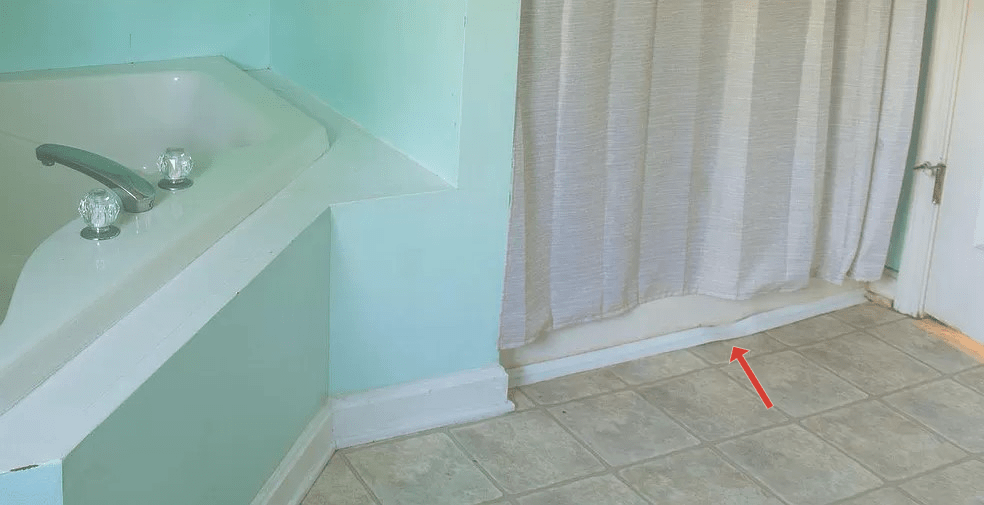
I went through that upstairs in the master bathroom. The previous owners had failed to repair the rubber seam strip at the bottom of the old shower stall that was meant to protect the floor from water seepage/shower spray (pictured below).
All that mess, all because of this not being fixed in a timely fashion:
Back to the topic at hand: the mold problem downstairs. I thought please, PLEASE let this be the end of it. Going without a washer until we repair the laundry room floor, or figuring out how to re-pipe the water lines to move the laundry downstairs (at least temporarily) is headache enough. Wrong again.
The Pantry

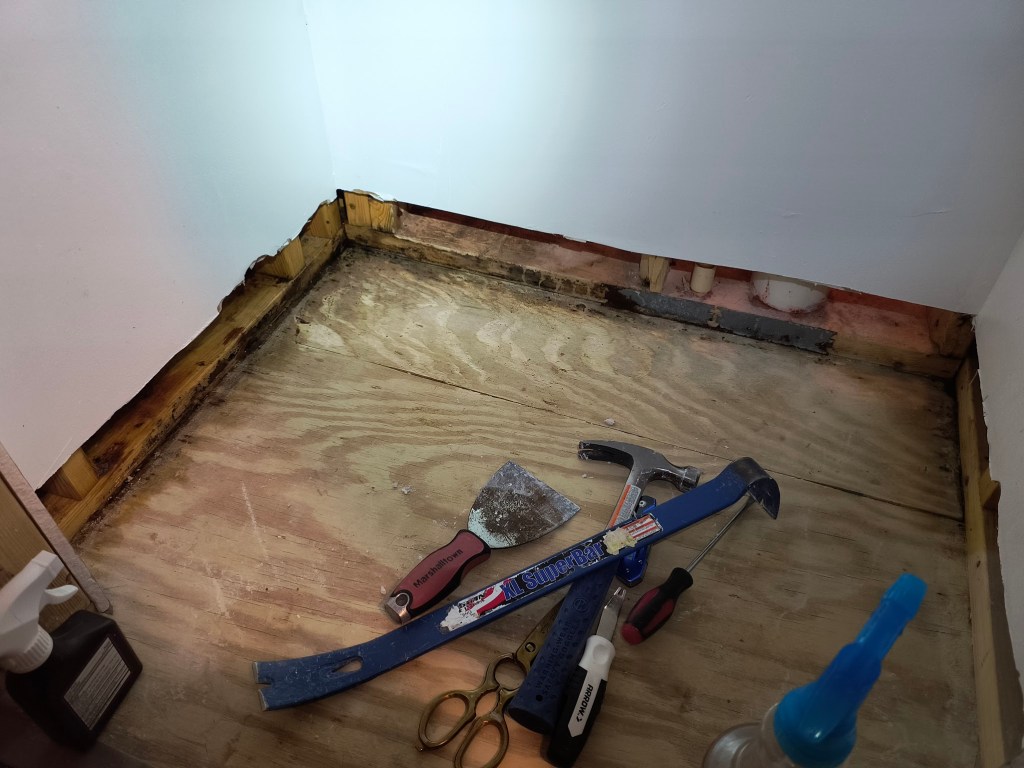
To my dismay, I discovered the exact same problem on the other side of that wall, in our pantry. However, there wasn’t much mold on the baseboard or drywall. It was worse…this rancid affliction seems to have contaminated some of the studs, the studs behind those studs, and infected the subfloor on this side as well.
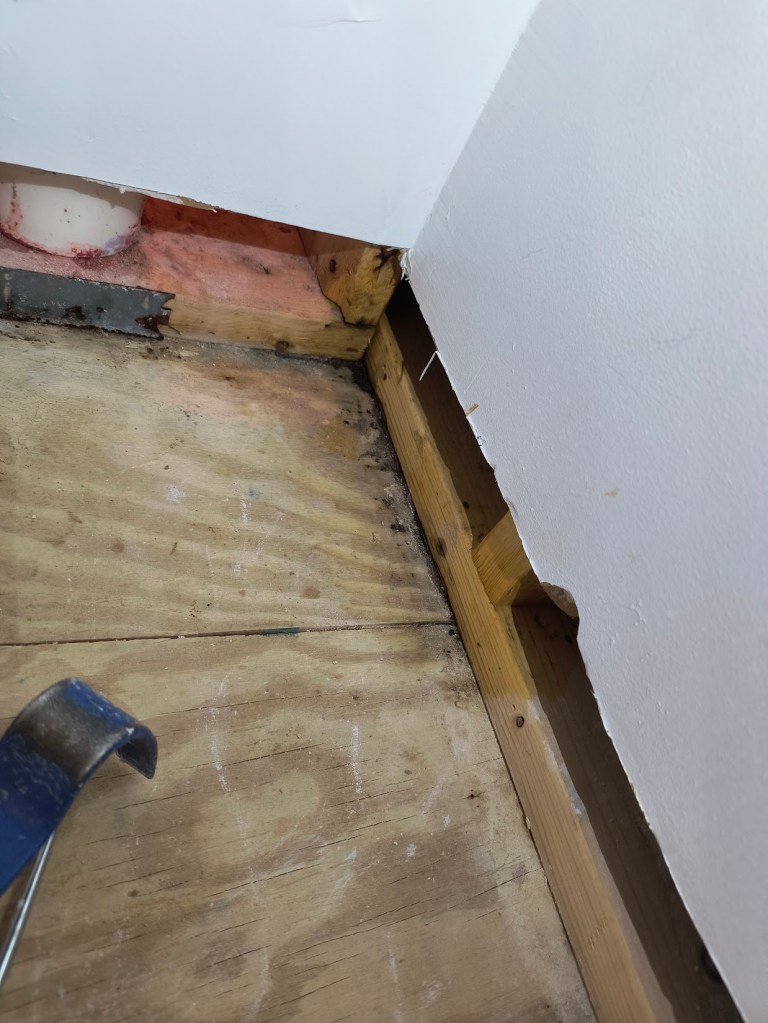
And so, instead of a simple removal of the old floor, installation of the new floor….we now not only have to remediate the mold, potentially relocate our laundry, tear up the subfloor, tear open the walls, and possibly replace a few 2×4’s. All to repair a problem that was not properly dealt with in the first place.
TIP: If you have a pipe leak or flooding of any kind inside your home, keep an eye out for mold. Here’s how to deal with it if it occurs:
Step 1: Shut off the water supply at local shutoff valves if the area has them. If not, shut off the main water supply.
Step2: Fix the leaking pipe or source of flooding.
Step 3: DRY everything out thoroughly by soaking up and/or removing the water and using a space heater to dry it the remainder of the way as long as it is safe to do so. Emphasis on thoroughly.
Step 4: Watch out for mold. If it starts to creep up, tenaciously kill the crap out of it. Bleach, peroxide, or vinegar are all tried and true methods we have discovered. Or screw it, smite it with all three, alternating which one you’re using. Never mix household chemicals. Or ye might smite thyself. It may take a while, (weeks or months to completely eradicated it depending on the severity) but remain steadfast and DEAL with it.
Step 5: Only when you are 100%, bet-your-life-on-it-sure that ZERO mold or moisture remains, patch the wall back up, the right way. TIP: What you use depends on how big the whole is. According to the Natural Family Handyman, a general rule-of-thumb for drywall repairs is as follows:
- Holes up to about 1/2″ can be filled with most wall patching compounds, such as drywall compound or light duty spackle.
- Holes between 1/2″ and 6″ can be repaired with a piece of drywall and drywall compound.
- Holes larger than 6″ can be repaired with a piece of drywall and drywall compound but should have reinforcing wood strips installed in the wall to support the drywall edges.
- Since wall studs are a maximum of 14 1/2″ apart, very large repairs will bridge across one or more studs. We’ll talk about large repairs in another article.
If things go horribly wrong, or you feel the repair is above your paygrade (you lack the required skills or comprehension), don’t be afraid to call in a professional. Better safe than sorry. Whatever you do, don’t be the like the Cumberworlds 1 that ignored it and thus left this problem to us.
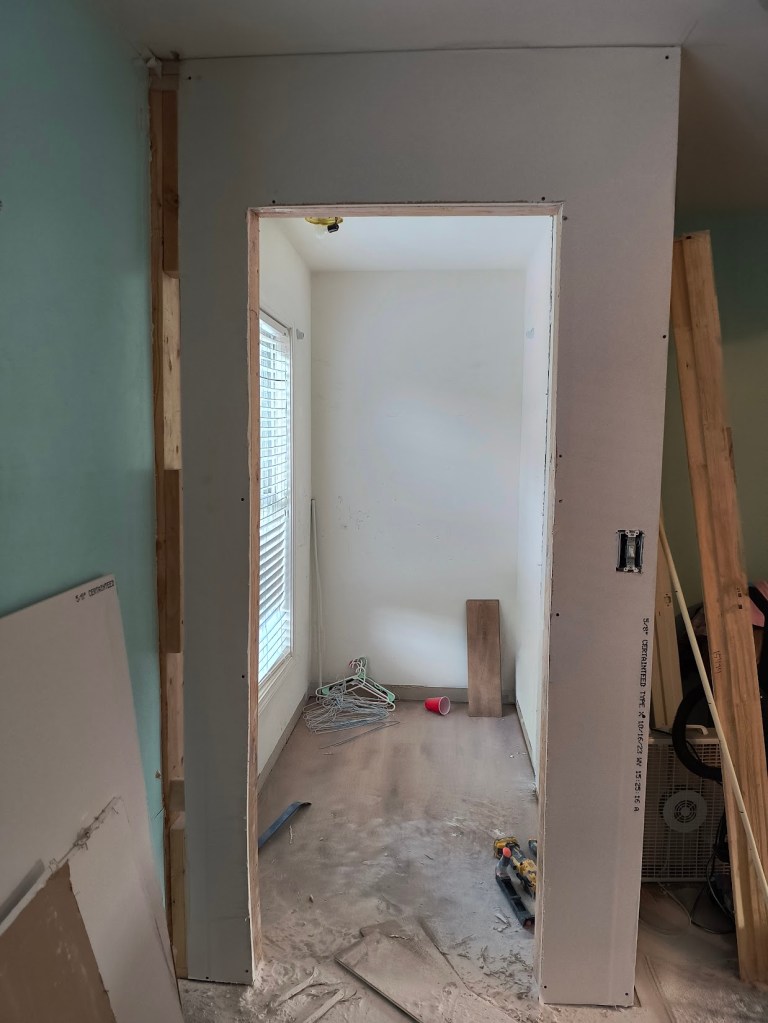
Back to the Closet
I’m going back into my closet to party with my skeletons, ya’ll. On a serious note, since we are at a kill, and kill again phase with the mold problem downstairs, I am back to working on my closet upstairs in between murderous spraying sessions.
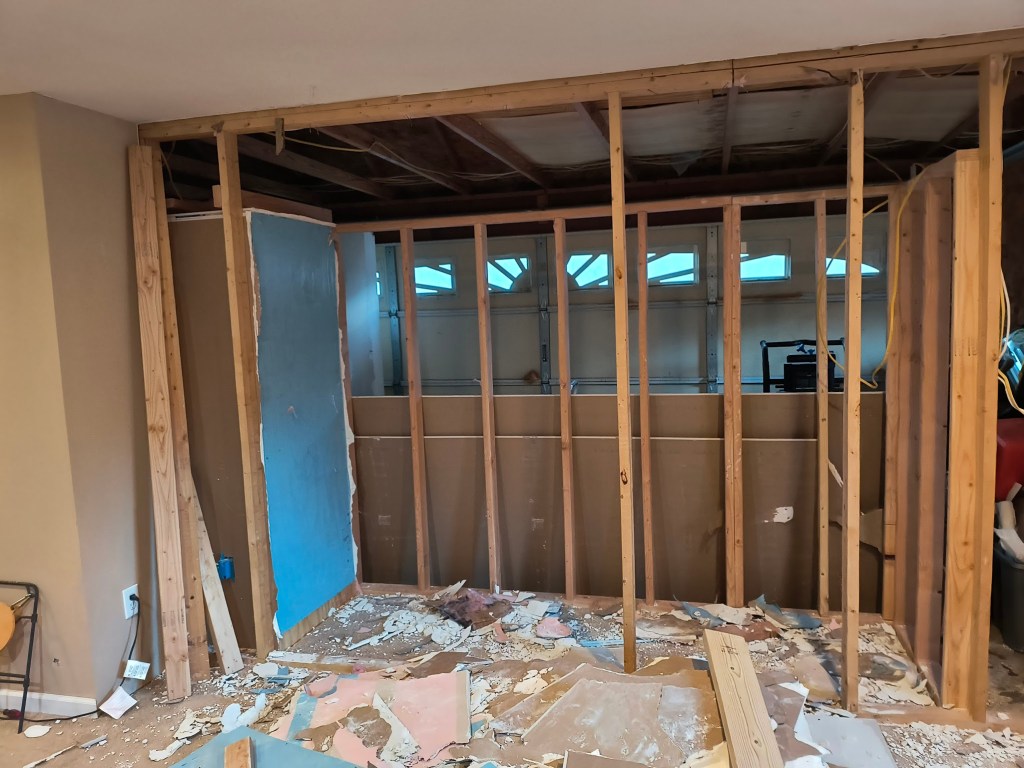
Besides, I am at an impasse with Project Turn the Garage Back into a Flippin’ Garage until we finish my closet. (Pictured below is where I’m at with the garage.) At that point, we can finally relocate our closet effects into my closet since it will be finished first. We still have plumbing to relocate before we can finish his. The Garage undertaking will be a separate post.
In any case, last week we purchased and carried the drywall upstairs. The second part of that ordeal was thanks to my brother coming to the rescue to help my husband carry it. There is no way in hell I can help carry 104+lbs of drywall 4 times up the stairs. Thanks Jon!
Consequently, I was not so ruthless as to ask my husband to do anything for the rest of the weekend. Nothing involving heavy lifting anyway 😉. This week we are finally in the process of installing it. The side walls aren’t too much trouble, just cutting around outlets and/or switches as needed.
For the doorway, however, we needed some special tools, at least according to an article I read at thisoldhouse.com. First, I purchased a jab saw (paid link), Dewalt of course. I have yet to be disappointed by a single Dewalt tool we have bought. Then a rasp, for cleaning up the ragged edges. This Jorgenson one (paid link, pictured below) is phenomenal! Seriously it is a dream to use. It has been my experience that Jorgenson is also a quality tool brand.
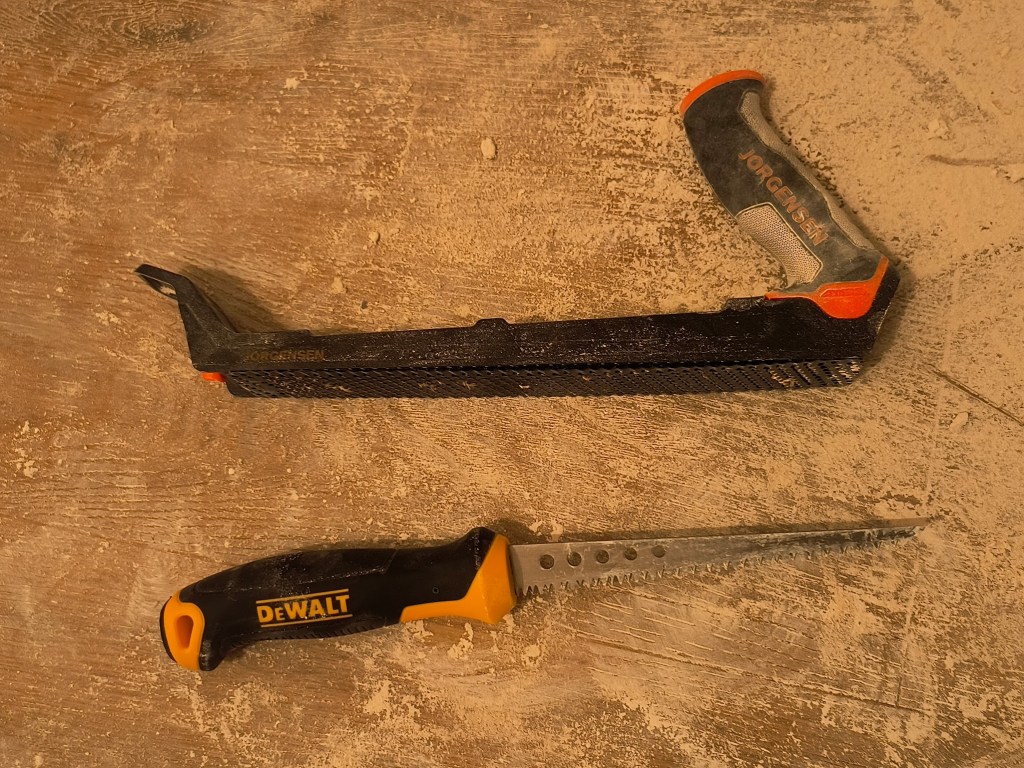
Here’s why I love it so much: the ergonomic grip, and the extra tab grip on the end, down to the easy thumb tension screw for quick blade changes. Speaking of the blade, that thing is sturdy and substantial! I feel like I could shave up rock sculptures with it, even though I only bought it for sheetrock.

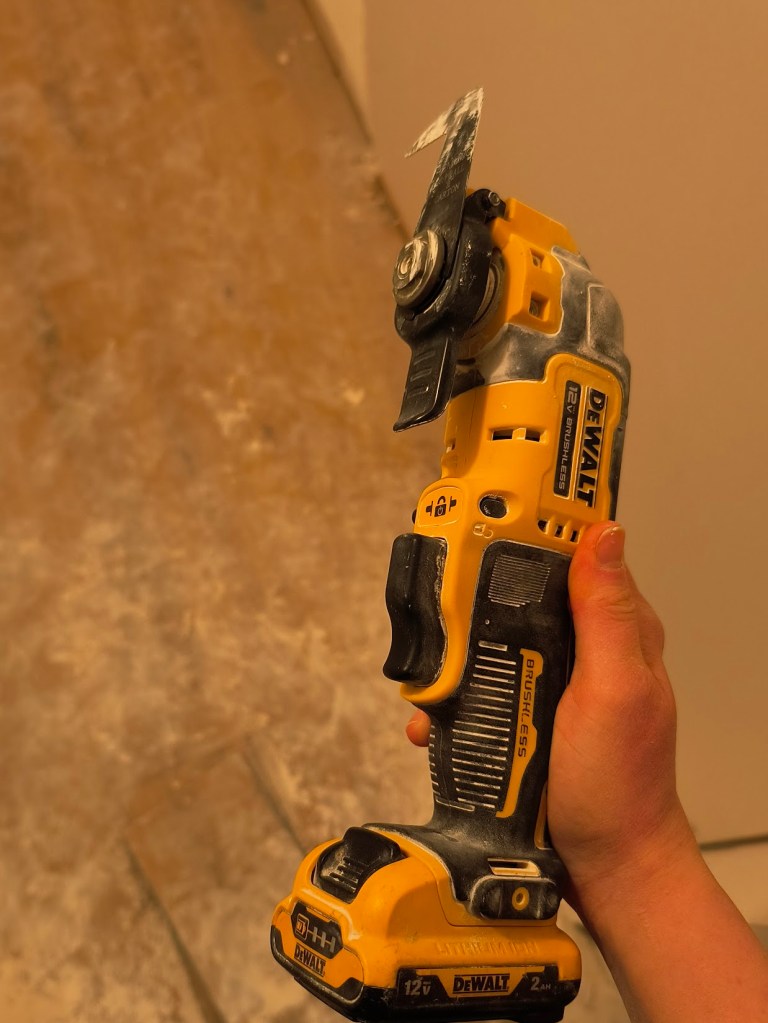
Last but certainly not least, I bought these oscillating tool blades (paid link) specifically made for drywall. I absolutely had my doubts when I saw where they were made, but they have been the best cutting tool in my arsenal for this job.
I still used the jab saw for cleaning up my cuts and precutting corners. Precutting your corners helps ensure that you don’t cut past where you want to stop. It also came in handy for smaller cuts like cutting around switches and outlets.
It’s worth noting that, unless you do this for a living (or a similar task), and possess the strength and endurance required for hand-sawing a doorway hole in drywall (hats off to you, I salute you sir/ma’am), the oscillating tool (with a proper drywall blade) is a necessity.

I am just a slightly overweight, currently out-of-shape, busted up vet. Honestly, I’m still trying to get my strength back from my shoulder injury 3 years ago. Not gonna lie, I’m weak as hell right now. So, I need the help of power tools at the moment. (If this is you, don’t feel bad. No judgment here. Besides, power tools are fun and sexy.)
Some lessons learned from this project:
- Installing the outer doorway side before cutting allows you to use the studs as your guide, cutting it out from the inside of the closet. Obviously you will need a friend to install it from the other side. It is much easier to make the cutouts after hanging it so you don’t have to do a bunch of measurements.
- After removing the door casing, and before you get stuck behind the drywall, don’t forget to tap or remove the nails that were holding it on. Or you can just take a hammer in with you.
- Also before you get stuck behind the drywall, double tap that you have all the tools you could possibly need for the task. If push comes to shove and you forgot something, you can always cut a hole in the part you are cutting away anyway and your buddy can hand it to you. Or if they walked off to the bathroom and you don’t feel like waiting for them to come back, you can cut a hole big enough to walk through and get it yourself like you should’ve done in the first place lol.
- Don’t underestimate the amount of dust you are about to kick up, especially using the oscillating tool. Be ready with your safety gear (ear and eye protection, and an N95 mask or respirator). I also like to throw on a bandana so I don’t get as much drywall dust in my hair. But hey, if you have oily roots, screw it, you can leave your hair exposed and use it as a dry shampoo.
- Obviously, don’t blind-cut around any switches or outlets, or even try to cut around them with the drywall installed. Even if you measured, or even if you can see where you’re cutting, you don’t want to accidently electrocute yourself. Measure and pre-cut those before hanging the drywall.
- If you are shorter than the doorway, don’t forget a stepladder for cutting the top of the doorway. Proper leverage isn’t just for safety, but also precision and comfort.
- Be mindful of the outward pressure you may be exerting while cutting, to avoid breakage of the parts of the drywall you would like to stay attached.
For cleanup, once again I’m reaching for my handy dandy Dewalt shop vacuum. Trust me, do NOT put drywall dust through your poor household vacuum cleaner that already has to deal with you and/or your family’s hair, pet hair, dust mites, crumbs, and whatever else you put it through. It will quit on you faster than it should, and before it does that, it may start screaming at you like this:
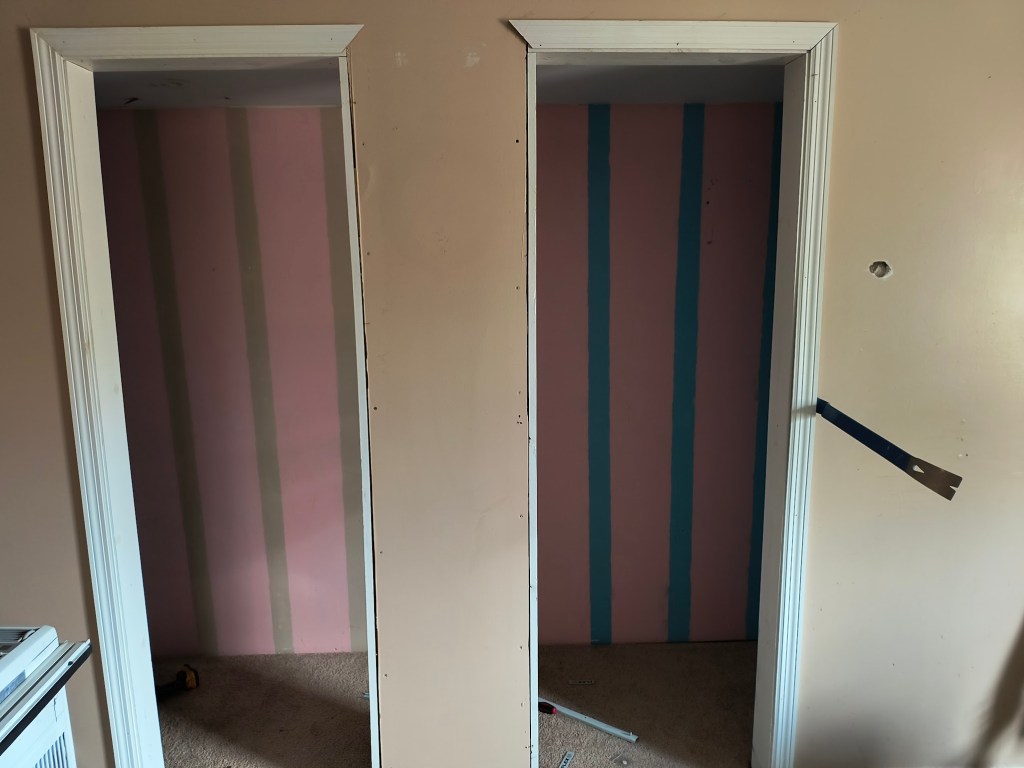
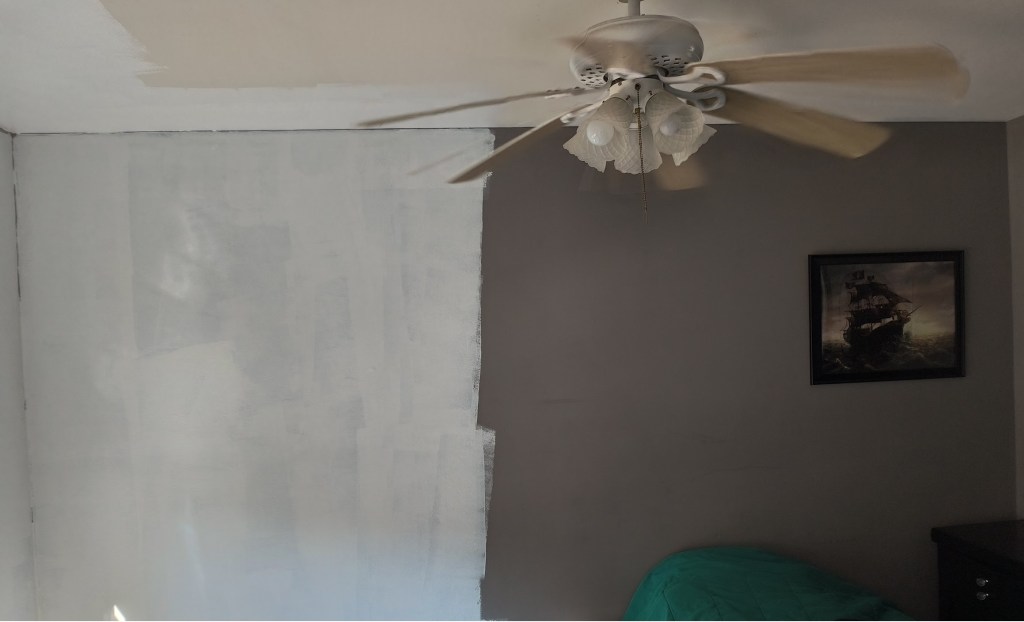
Yes, quite unpleasant. I can’t use it anymore without earpro. Do yourself a favor and learn from our silly mistakes. In other news, in between hanging drywall and killing mold, I’m working on painting our childrens’ bedrooms. Goodbye, mournful mauve paint.
Currently, there’s only one coat on half of the room, but it already makes such a difference. I am excited to pick out the color (with our son’s input) and go from hotel towel white to an uplifting, yet relaxing hue.
To sum it up, we’re still working the master bathroom remodel, battling mold, drywalling my closet, and painting our kids’ bedrooms right now. It seems like a lot to be doing at once, but when you consider that each project requires drying times at some point in the process, it’s not bad.
We’re also trying to decide how we would like to do our stairs, now that we have the old, nasty, carpet ripped off of it. There will be a separate post about the ins and outs of that project when we are finished with it. For now, they will just have to be naked. At least they’re clean.
All of these projects keep me productive and working towards our goals for our house, rather than just being stuck. Which in turn, helps me stay out of my head and keep my PTSD in check. Now I want to hear from you! Are there any tips, tricks, or tools of the trade for mold remediation, repairing water damage, drywall, or painting that anyone would like to share? Please comment below!
Stay tuned for the next episode of our Current Home Improvement Project.
- Also called a cumberground—someone who is so useless, they just serve to take up space. (Jones, 2023) ↩︎
