
Disclosure: This post may contain affiliate links, meaning I get a commission if you decide to make a purchase through my links, at no cost to you. As an Amazon affiliate, I earn from qualifying purchases. However, I only recommend products I would use myself and all opinions expressed here are my own.
For those who have yet to embark on such a journey, you may be wondering what it’s like to take on a major home improvement project. Well, to be frank, there have been many points in this process where I’ve thought to myself:
“What the hell did you get yourself into??” or “We’ve bitten off more than we can chew.” It’s felt downright overwhelming sometimes, but it has been worth it. It is worth it. I’m gaining new skills all the time, and honing others. This gal is just not content to sit still and look pretty.
“Grit is not just a simple elbow-grease term for rugged persistence. It is an often invisible display of endurance that lets you stay in an uncomfortable place, work hard to improve upon a given interest, and do it again and again.”
– Sarah Lewis
I’m finding out exactly what I’m made of, or rather, being reminded: strength, perseverance, grit, determination, and ambition. I come from humble beginnings, and I am still nowhere near affluent. But over time, I have learned you can take some junky stuff and make it good, nice stuff.
I’ve done this with furniture, recycled items, and even a car project before. But I never dreamed I would one day be applying this concept to a house. At times, I still cannot fathom that I am actually taking this on.
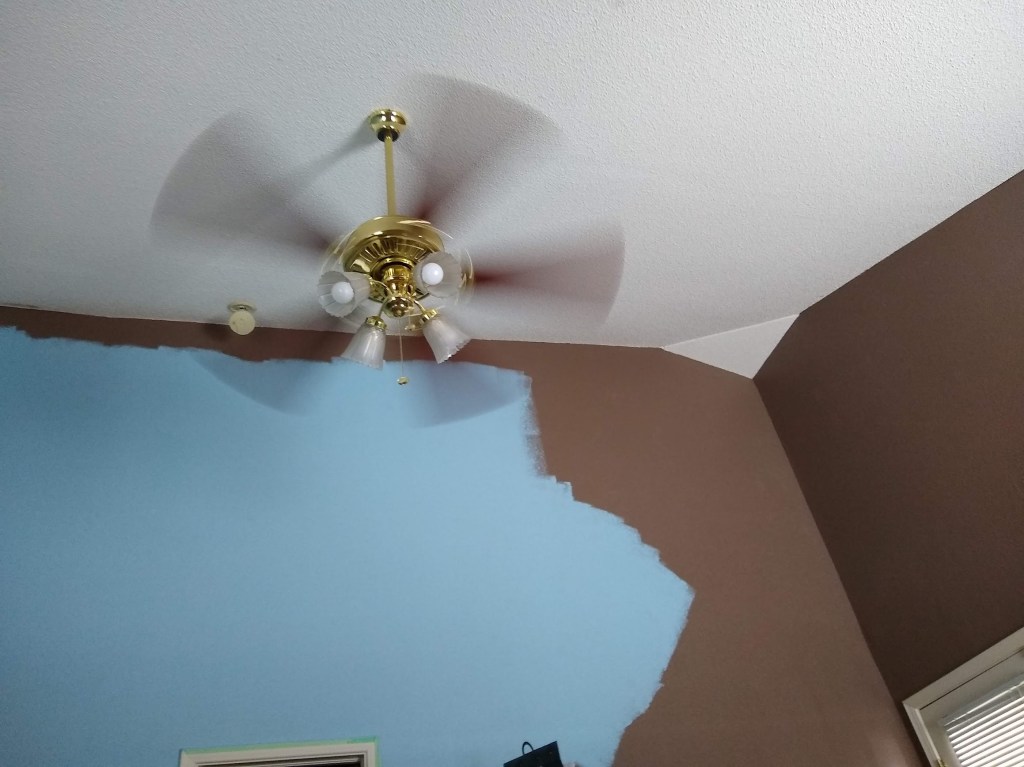
Painting a wall or a room is one thing. My first experience with that was a few years ago. I agreed to rent my friends house who was leaving the area, if I could paint the master bedroom. The walls where poo-brown, matching the poo-brown carpet. Yuck. Depressing.
She agreed, and I painted it a beautiful, vibrant, yet relaxing hue of blue, completely changing the feel of that room. It went from feeling like a dungeon or creepy truck stop bathroom, to a relaxing, uplifting space to unwind and sleep in. Notably, it was more challenging that I thought it would be, but it definitely paid off.
Painting the entire interior of a house is another. I did that for the first time a few years later, when we bought our first starter home. I will be writing (and providing a linking to) a separate post about that later on. That was my first major home improvement project.
However Remodeling1 part of a house, or renovating2 a significant portion of it, are both entirely different concepts. Both involve considerably more work, and require learning skills you never thought you would need. I’m so thankful for resources like YouTube and other home improvement blogs like Family Handyman and This Old House. The awesome fellow below showed me how to remove a bathroom vanity without messing up my walls:
The other option, of course, is hiring these tasks out to professionals (if necessary and you can work it into your budget). We prefer to take the DIY route not only for budgeting reasons, but also for the new life skills and experience we are gaining. Although, admittedly, some days this feels absolutely insane. Scary, even.
On the contrary, most days it is a truly rewarding journey. I’ve learned so much that I never would have otherwise. Not to mention the tangible validation. Something real that you can see transform and improve before your eyes, and the satisfaction that only comes from knowing that you made it happen.
I know it will be worth it in the end, as already evident in the areas we have finished. I am confident that this will be a significant return on investment. This may be the nicest house I have ever had the good fortune to live in. Now let’s dig in to the nitty gritty! (Literally…see below photo. UGH.)
Water
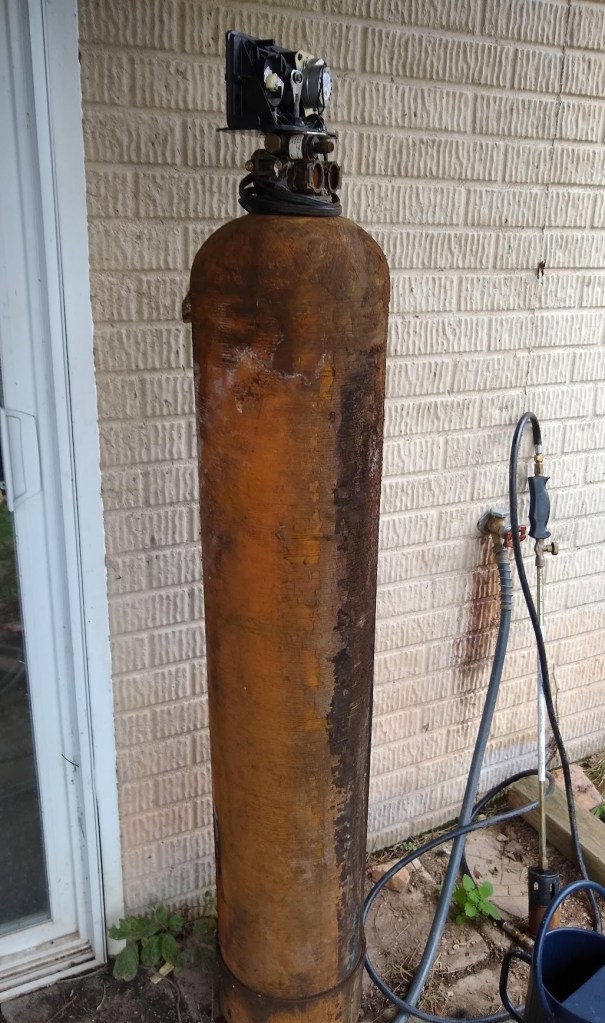
As I stated in the previous article, the first project we took on was the water filtration and softener system, for obvious reasons. Health concerns, staining and scaling, and the unpleasant sulfur smell. After doing my research, I chose this system from Springwell. I especially liked that they have a 6 month guarantee on their products, which is much longer than any other company I checked out.
We also replaced our toilets, so the state of the tank wouldn’t burn out our under sink water filter (Paid link. And it’s currently-at the time of this posting-on sale! Read about why I love it below.) before we could install the new main house water filter. I have NEVER seen a toilet tank that looked like this:

Quick note about the linked product above. That water filter is amazing, and made in the glorious U.S.A. I bought the first one when I lived in a border town in Texas, and I discovered that our tap water was making us sick. Montezuma’s revenge3 is common knowledge. However, this was on the U.S. side.
Installing this stellar under sink filter (no loss of precious fridge space!) solved that. Their customer service is also excellent. When this filter which is supposed to last 5 years, burnt out in 2 years, I contacted customer service. After explaining the situation, they quickly replaced it, free of charge.
Flooring
The next item on our agenda was the flooring. To my surprise, picking out flooring was just as involved a process as picking out paint colors. Many trips back and forth to flooring and home improvement stores to see what they had to offer and taking home samples to see how it would look in our space. Rinse and repeat until we were happy.

The luxury vinyl plank flooring we chose is produced by Stainmaster, and it is advertised as waterproof, pet proof, quite durable for houses with busy families. This means we could have used it throughout the entirety of our house, and many choose to do that. However, we’ve always liked the look of a different flooring option for the wet areas (Kitchen and bathrooms).
For these areas, we chose a luxury vinyl tile (also by Stainmaster) that complimented our wood planks beautifully. The only hiccup was a 1mm difference in thickness, which had to be made up by a 1mm underlayment. No big deal. Both of these options also have a wonderful texture to them, as close to the real thing as I believe exists for luxury vinyl plank/tile flooring.
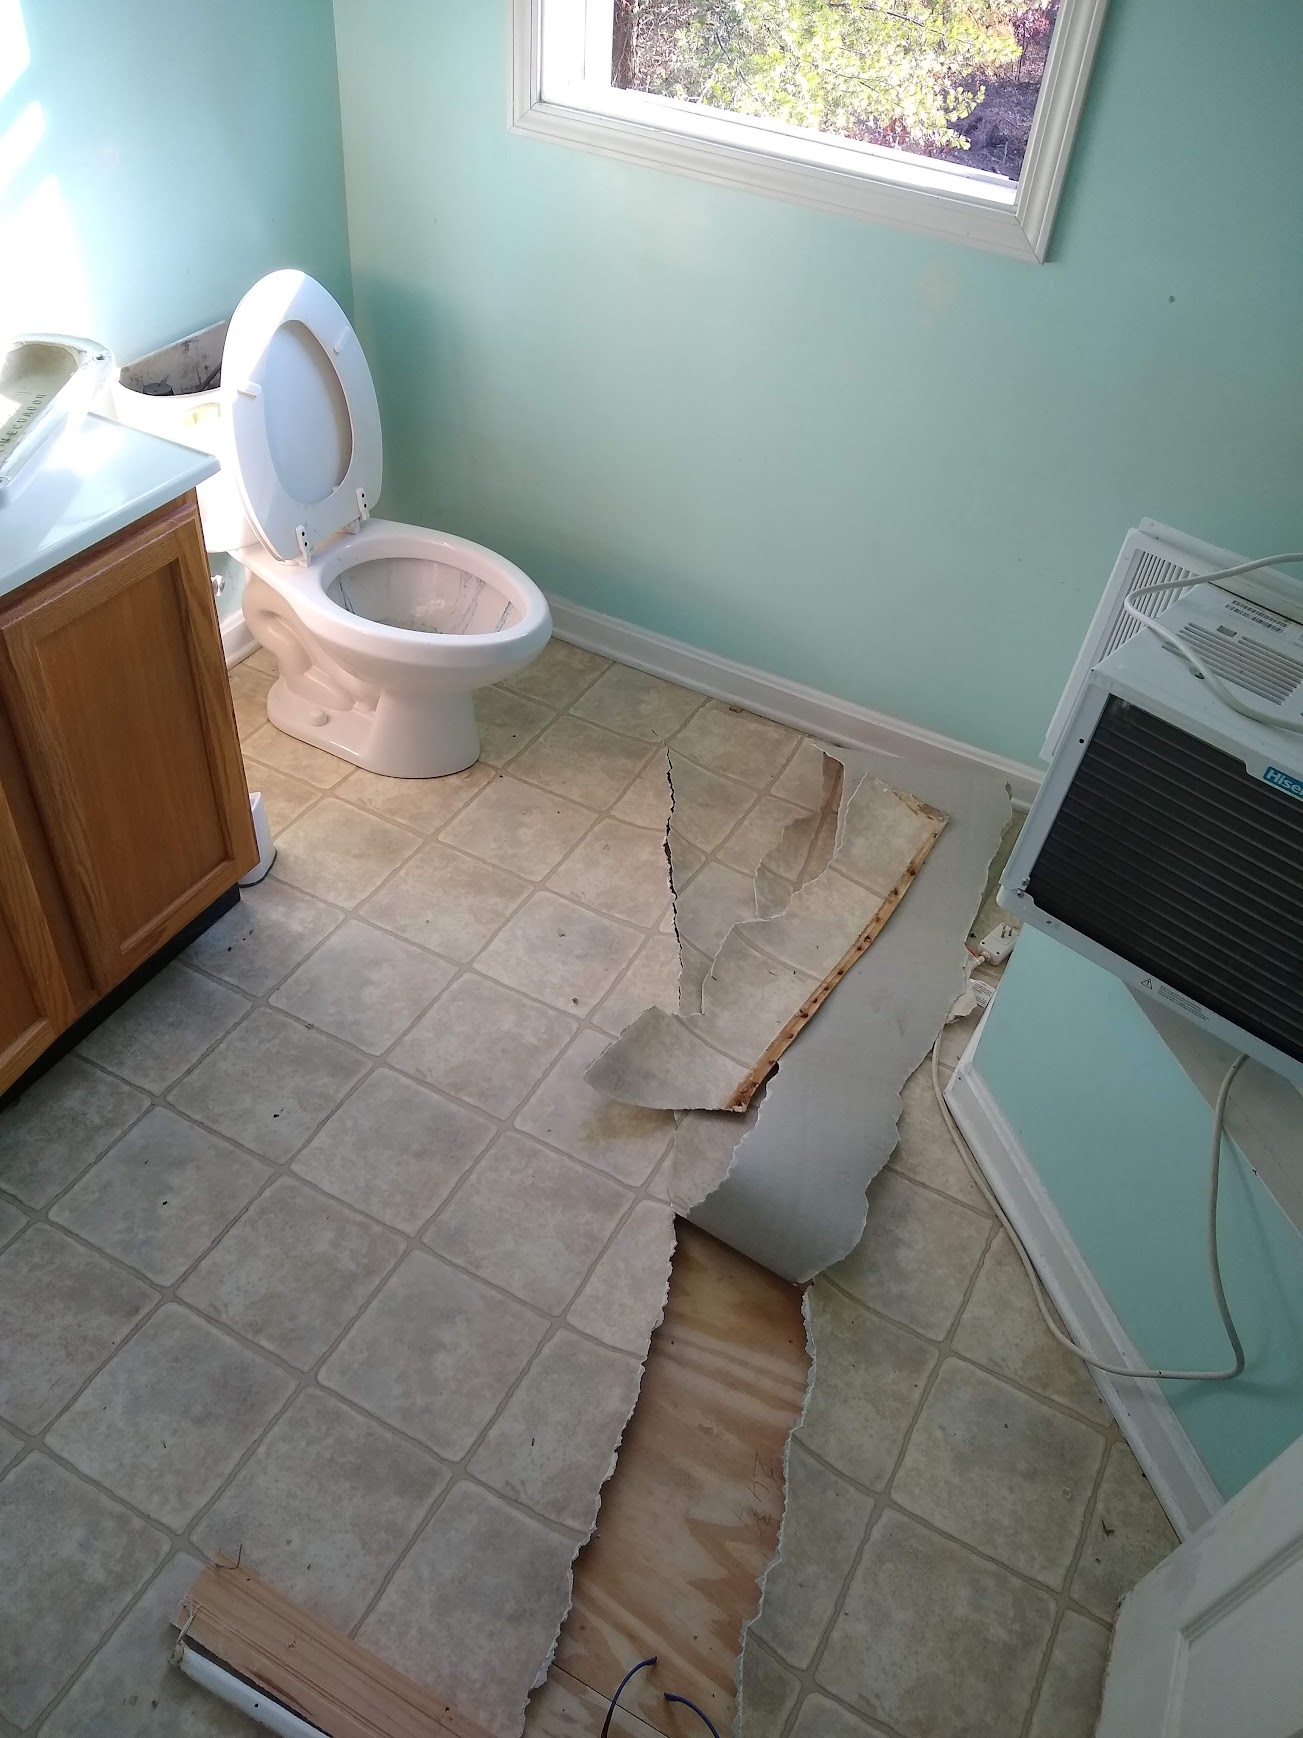

After we finally finished choosing and ordering our flooring, we had to prepare for the installation. This involved first moving furniture if needed, removing baseboards, door trim, doors, and door casings. Then tearing up the old, nasty flooring, and prepping the subfloor (bleaching the hell out of the pet urine affected areas and vacuuming).
See that discolored bit there in the above photo (right)? That is old pet urine that was never cleaned up properly and seeped onto the subfloor below. Gross. After cleanup, we filled any gaps in the subfloor bigger than 1/8″ with plaster, and added screws to any squeaky parts, which are caused by loose nails. We also found we had to touch up and fan out the plaster that already existed to smooth out a ridge in the floor (pictured below). Based on my research, this can occur as a result of settling of the house.
Finally, after the arduous process of preparation, we began laying the clean, new, beautiful flooring. Yay! We chose to start in our bedroom, as it was already empty and we wanted to move out of the garage as soon as possible.

We found that the hardest part of the installation is getting through the learning curve and knowing what the heck you’re doing. Besides that, the first couple of rows are like trying to dress a toddler who missed their nap and is also a cat. Once you conquer that, though, you’re golden!
Cutting around doorways and such does require acumen and precision yet seems like a cakewalk compared to installing the first couple rows of flooring. Still, if you struggle with complex math, especially geometry, this part may seem akin to trying to play charades with a blind person.
Additionally, there will be areas during the process where you will need to cut long strips (off the long side of the plank) to finish a room or hallway. This is tough without a tablesaw or a special floor cutting tool like this one (paid link). Believe me, I wish I had known such a product existed before I bought this generic one from Lowes:

Secondly, I highly recommend getting a pad to place underneath your knees, or a set of kneepads. I found the kneepads I was using to be more annoying than helpful, as they kept sliding down no matter how much I ratcheted down the straps. Thus, I ended up buying this Kobalt pad from Lowes, and sliding it along wherever I needed it.

Other things to keep in mind whilst installing flooring:
- Remember to vary both the seams and grain styles of the planks in a randomized fashion. Varying the seams is very straightforward, you simply change the size of the cut pieces used on the ends. Varying the styles takes a bit more brain power, planning the layout of 3-4 rows at a time.
- Be mindful of not repeating a row of the same pattern of styles too close to the last one. For example, if you use style 1-2-3 on the 1st row, don’t repeat that exact same pattern until row 3-4.
- Patience is key! The connecting edges break very easily. So take your time, and many deep breaths during the process. If you feel like you are rushing or starting to become frustrated, it’s time for a break and a nice, refreshing beverage!
- Lastly, it really helps to have a second person, for a multitude of reasons, including the installation of the first couple of rows, carrying the heavy boxes, swapping out on different tasks, and another set of eyes for tips 1&2 above.
Side note: I have a deepened respect for people that do this or other construction/manual labor jobs for a living. I totally understand why dudes (or chicks) with manual labor jobs are so beat by the time they come home now. All I wanted was a cold beer, a comfy chair, and dinner by the time I was done each day of this project.

I almost wanted to cry when we finished the first room. Not sure whether that feeling was born out of physical pain, exhaustion, or joy that the first room was over. Indeed, it might have come from knowing that we had so much more to do. Seriously, if you are over 30, keep the Ibuprofen and ice packs handy.

I don’t have many photos of this process, as we were just waking up and grinding away every day on this. We just wanted to get it done as quickly and efficiently as possible. If we stopped to think about it for too long, it was demotivating. We still have the laundry room and our bathroom to do, and then we check this project off of our list of repairs.
After that, the next step is to paint the walls in colors that don’t resemble urine (blech!) and depression (meh…). Then we can paint and install new baseboard and door trim, and in many cases, new doors. I haven’t the slightest idea what kind of zoo was being run here before us, but at least two of the doors upstairs were cracked, like someone was trying to kick it in at some point.
Funnily enough, one of door casings for those cracked doors also broke while we were trying to remove it for the flooring install. This happened because we didn’t realize there were huge nails and screws holding it on. The divots had been covered with caulk and paint.

Unfortunately, we will have to wait for spring to do the baseboards and trim, because the weather is disagreeable for painting right now unless you have a controlled environment (heated) room in which to work. The weather recommendation for best (drying and adhesion) results is 50 to 85 degrees with humidity levels between 40 and 70 percent.
That’s plenty alright with us though, as we still have a myriad of other things to keep us busy in the meantime. Not to mention, it feels like we are working at a snail’s pace. That could just be my crazy ambition and drive talking though. Many times I feel the urge to sprint when I know I need to casually stroll.
More often than not, I have found that just about anything you need to fix on a house or vehicle takes considerably longer and costs more than you initially think it will. Usually the task at hand ends up being much more involved than it first appears…at least if you are trying to do things the correct way.

- Remodeling: altering a structure from its original construction, whether interior or exterior. i.e. changing the layout of a bathroom. ↩︎
- Renovating: to restore or repair a structure. This can include replacing or repairing outdated, worn, or damaged parts of a building. i.e. refacing cabinets, installing new light fixtures, repairing a wall, etc. ↩︎
- Montezuma’s Revenge is diarrhea that is commonly experienced by people traveling south of the U.S. border, particularly Mexico and Central America. ↩︎

Thanks for such very great information..
best interior designer in hyderabad
LikeLike
Thanks for such very great information..
<a href=”https://www.vaishnaviinteriors.in/”>best interior designer in hyderabad</a>
LikeLike